Wednesday, December 7, 2011

Final Evaluation

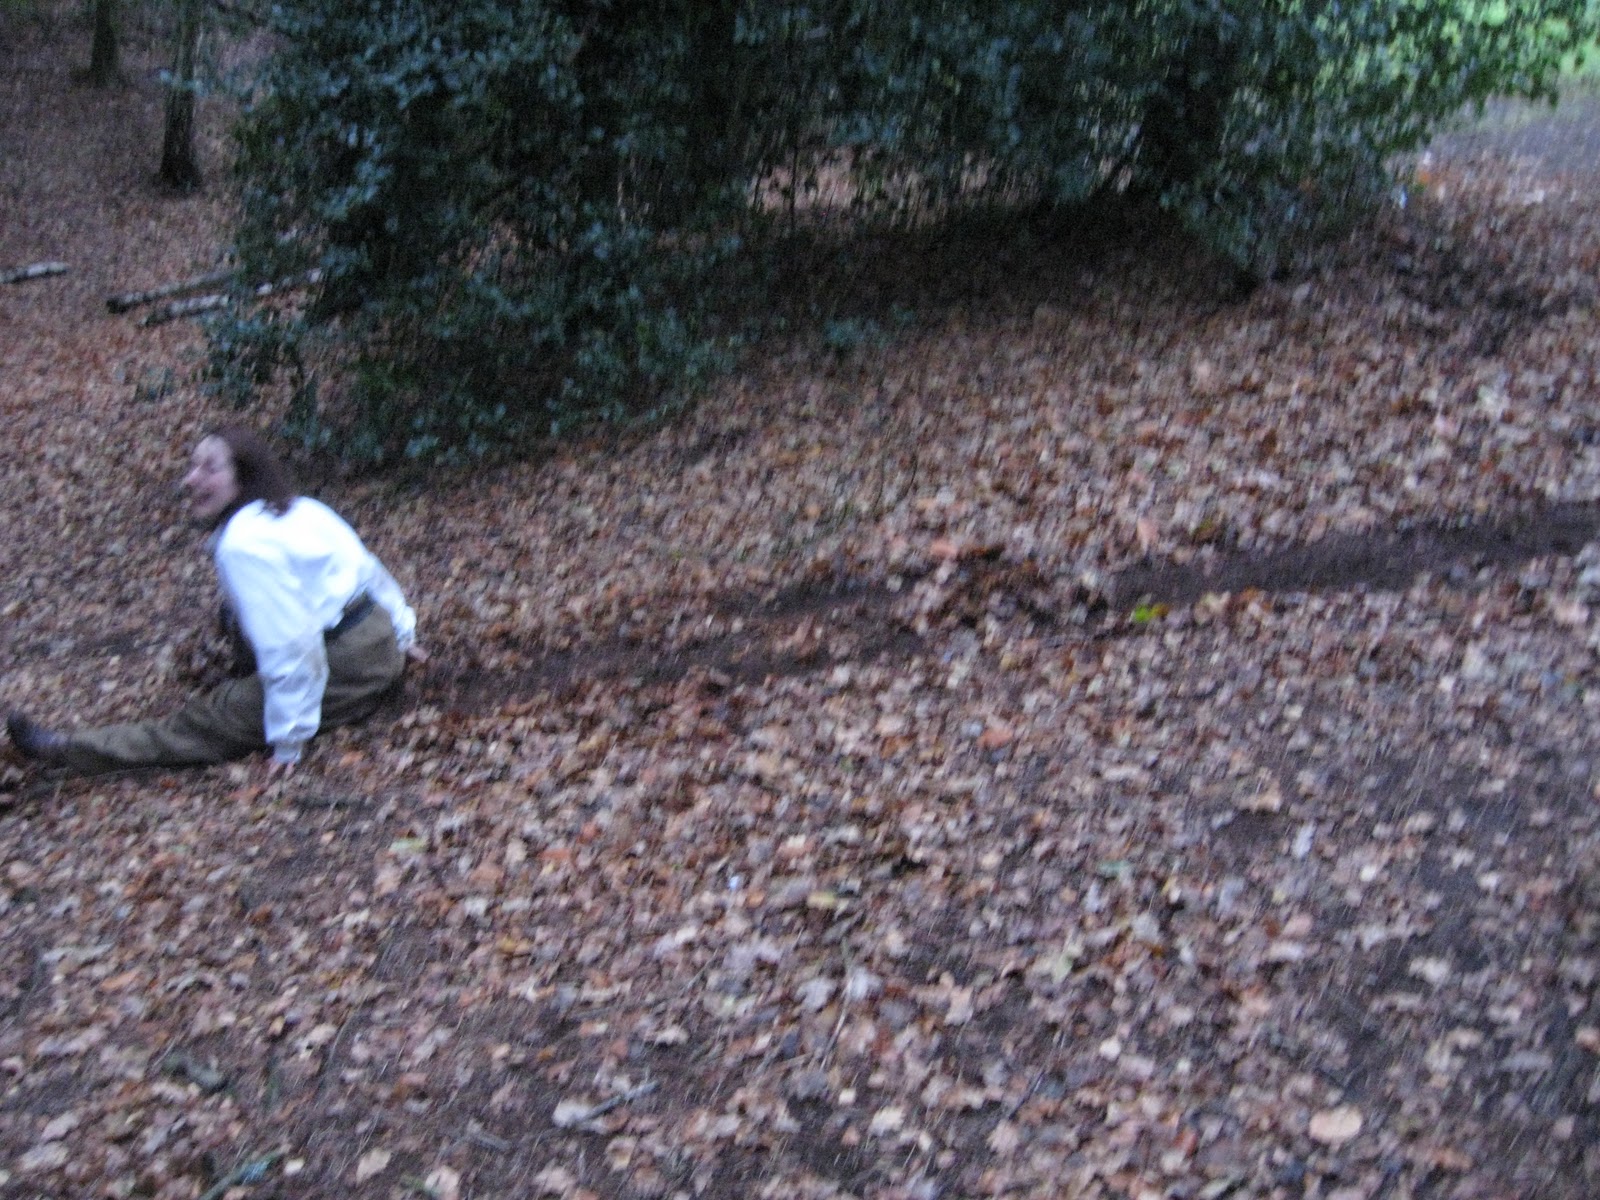
            In completing the Soldier’s costume and the Narrator’s waistcoat for The Soldier’s Tale I have learned about the importance of context for making the costume, improved my technical skills in sewing and pattern making, and experienced working on a live show. One of the most important things I have learned on this project is the importance of context to the costume. This project was unlike any I had done at the AUCB so far. My costume design was unique to a specific character which meant I had to really focus on the story and the characters role within it so the costume would be successful. Looking through the designer’s sketchbook was very helpful, as was looking at pictures from the time. Images from WW1 are particularly powerful because they show the suffering and struggle for the soldiers and they helped me better understand what Stravinsky was influenced by when he was writing the show. I do wish I would have pushed myself more to look and read the script or find a recording to listen to; that is something I will keep in mind for the next live show I work on. The other import thing I learned about context is that it isn’t defined just to book and image research. In order to better understand breaking down I had a friend wear my costume and run through the woods. This was helpful for me to see where on the costume got the most wear and dirt. We also tried to do things that a travelling soldier might do, like crawl or sit in the grass. All of these activities helped me understand, possibly, what my character was going through the kind of stress his clothing would be under in day to day life and that was extremely important contextual research.
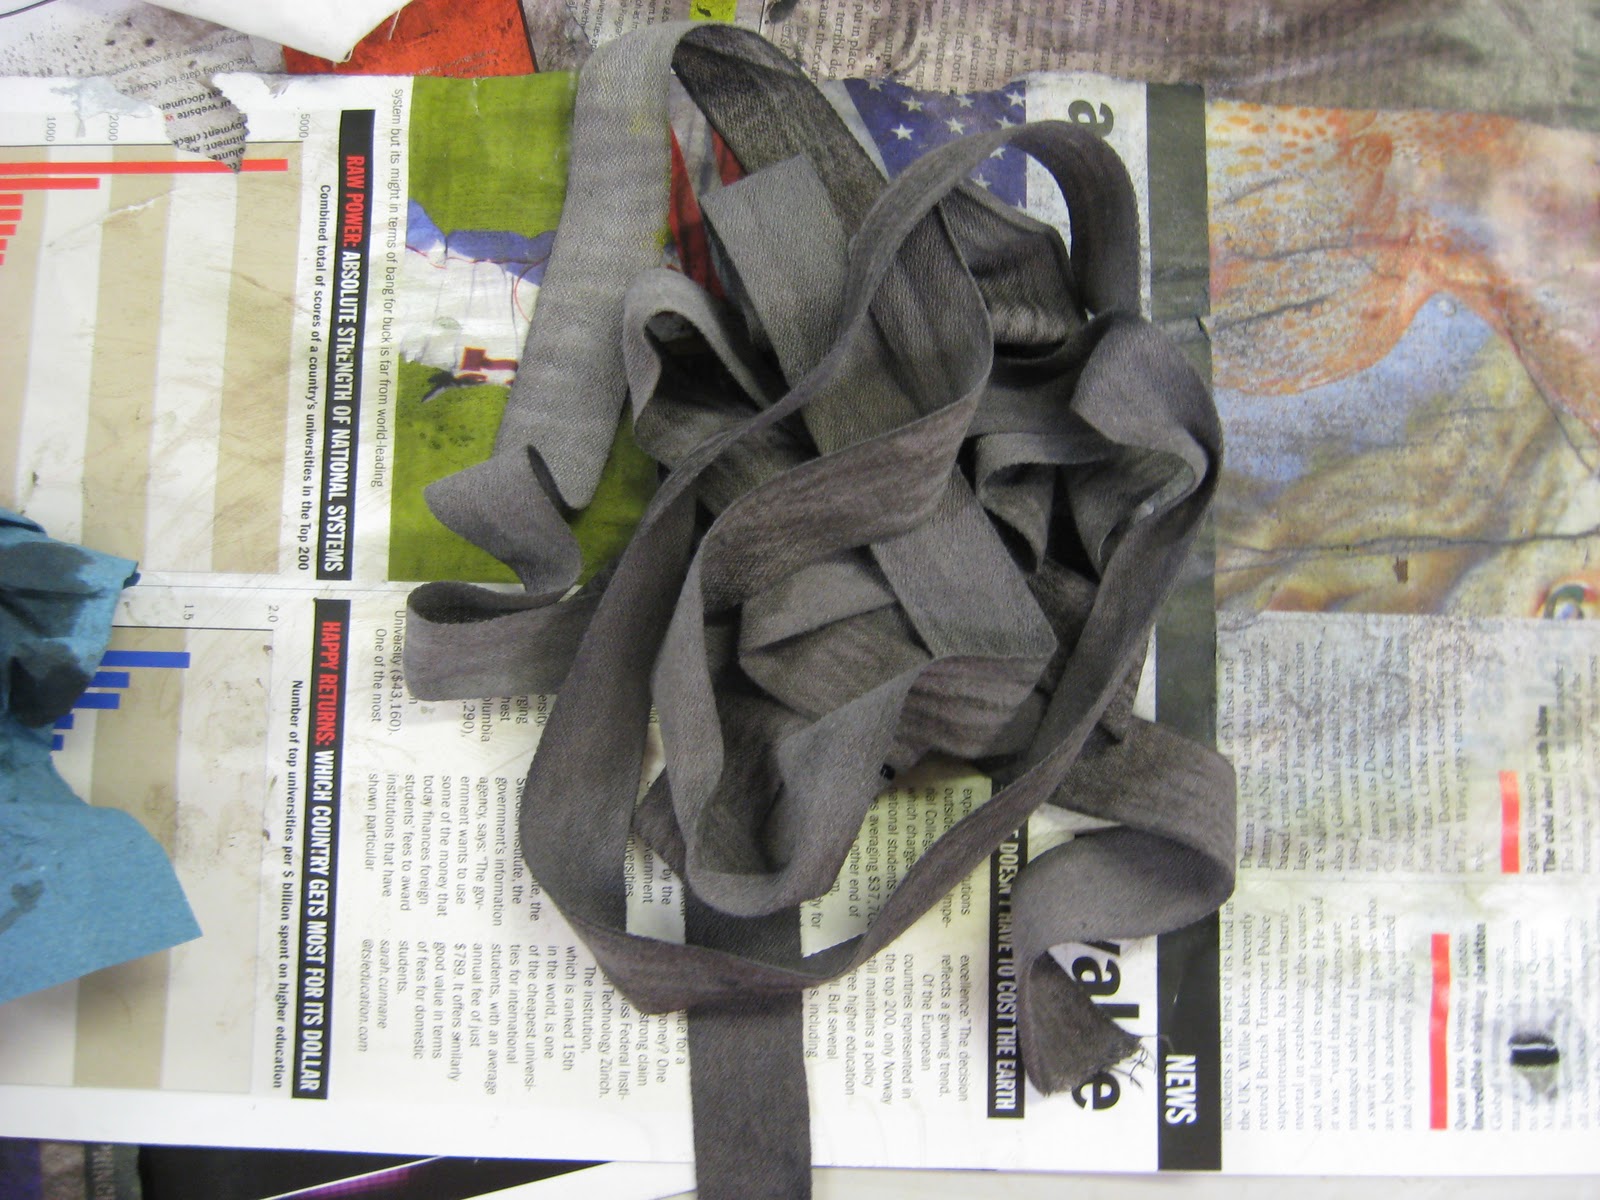
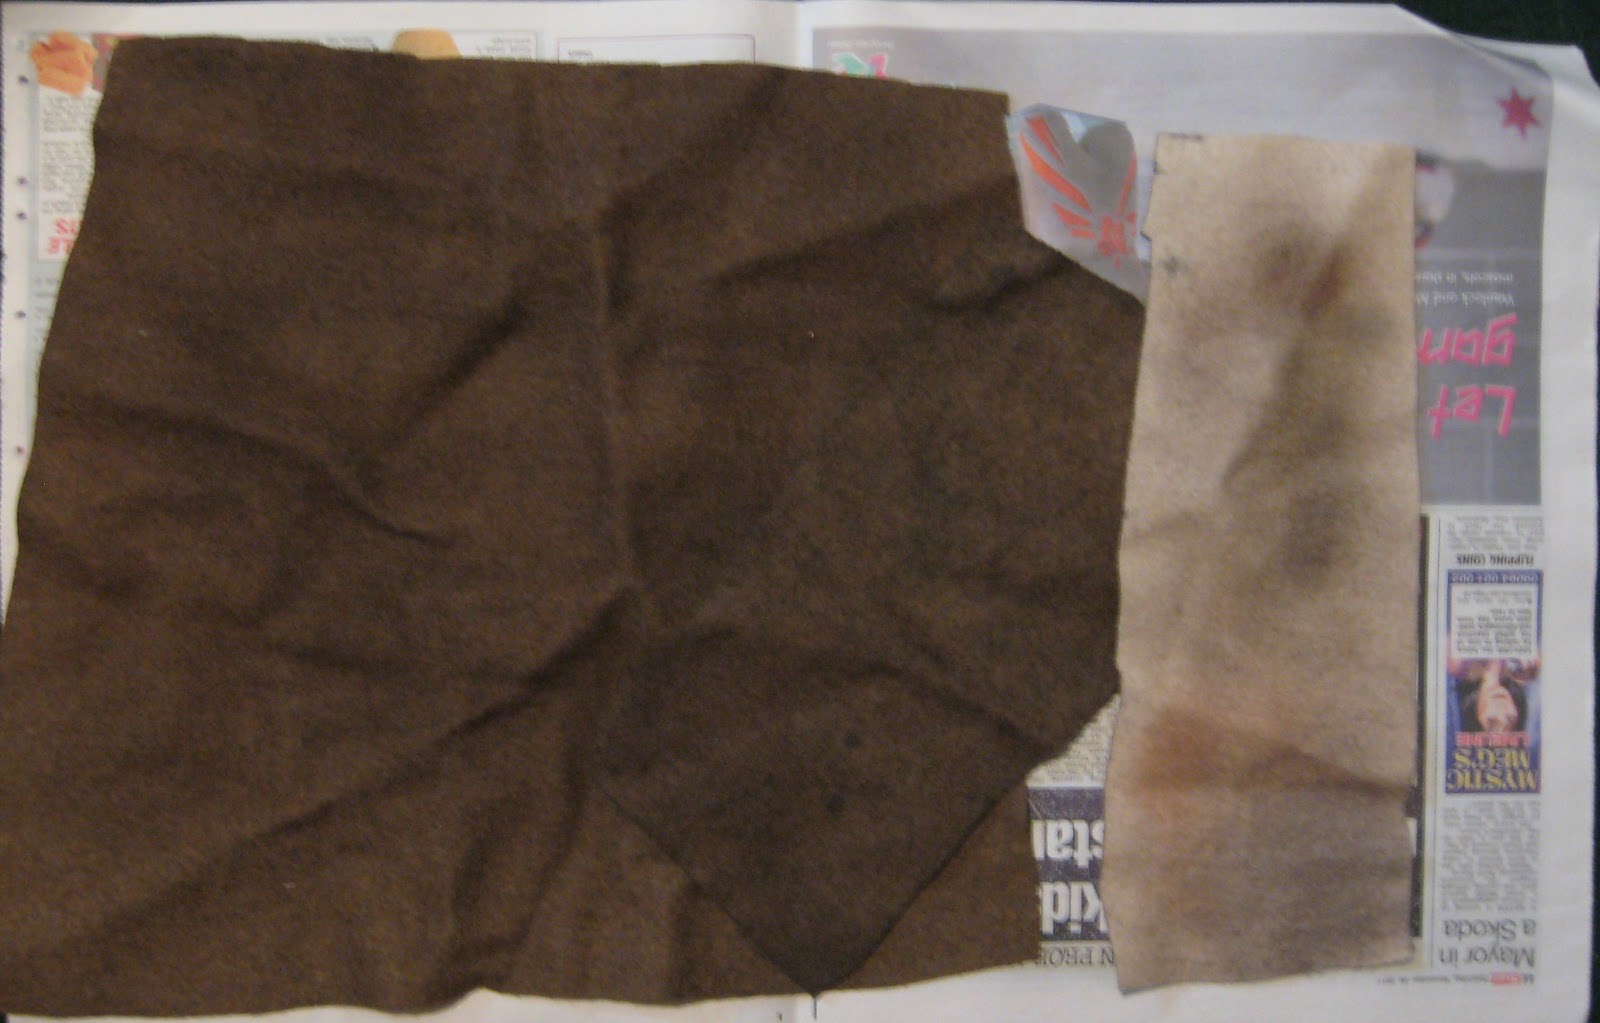
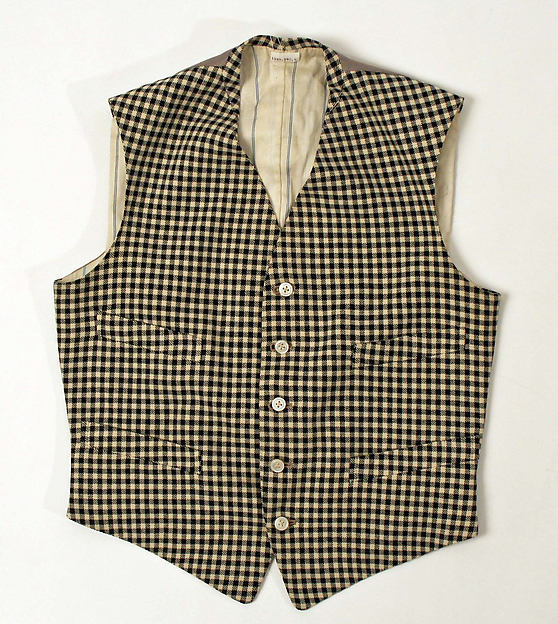
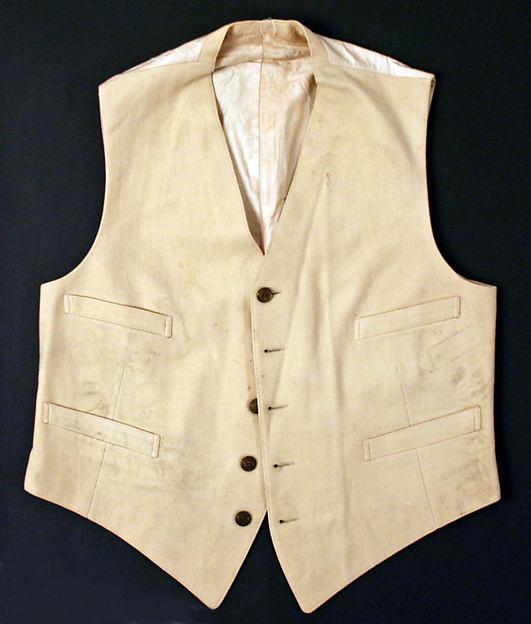
            Improving my technical skills has also been a huge part of the project. I did a great deal more of pattern making in this unit than the previous one and that gave me the chance to improve those skills. I was able to challenge myself with using historical patterns and research, something I have never done; and then to also return after fittings and make changes and alterations. Creating the pattern for the trousers was a particularly successful venture that started with a tailored trouser pattern but first hand research at History in the Making led me to use a historical pattern and free hand my own design line changes. Once I gained the knowledge from History in the Making and historical research I was able to discuss with the designer and include contextual design changes that better fit the character. This project has also taught me to cope with many alterations after fittings. In my last unit I made costumes that were not for a specific person but for a hire house, working on this project I had to both technically and aesthetically complete the design. Having fittings with the designer, director, actor, and tutors was at points an overwhelming experience, but having my finished project I can see that the criticism was constructive in completing the design. This is clearly evident in the journey the soldier’s shirt took. The toile shirt and the shirt at the first fitting were just shirts; they didn’t quite fulfill the design although they were technically correct. The changes after the first fitting were intimidating but at the end of the project working out the alterations to complete a shirt that was a design feature and not just a shirt was extremely rewarding and instructive. The waistcoat contained many technical challenges due to the pattern and weight of the wool. It held less of a challenge contextually but out of all the garments it was the most technically challenging despite the fact that I’ve made a checked tailored waistcoat before. It gave me a lot more confidence in my tailoring abilities.
            Working on a live project has been an important aspect to this unit and really given me a look at how working in the industry might be. I really enjoyed working with the designer Rose, I feel she had the right amount of diplomacy. I felt comfortable coming to her with questions and felt equally as comfortable coming to her with research and ideas. I felt I had support from the team I was working with although I still maintained my independence which I greatly appreciated. I also enjoyed my opportunities to work with Kokoro throughout the project. Being able to say I’ve worked with the Bournemouth Symphony Orchestra is an impressive addition to my portfolio and a great life experience. I have tried to work professionally whenever I have been helping with any aspect of this project, be it course members or outside contributors. I also think maintaining my blog has contributed to this live project. Being a maker doesn’t always mean I will be a dresser and interact with the performers, but having a blog kept me connected with the industry. It also gave me a chance to create an individual way of presenting my work that I can carry on with after I graduate.
I am extremely proud of all I have accomplished in this unit.

Bibliography


Specialist Practice Bibliography

318th Infantry Regiment 80th Division, AEF (n.d.). Putting on Puttees. [Online] Available from: http://www.hardscrabblefarm.com/80th/putting_on_puttees.htm.  [Accessed 4 December 2011]

Cariou, G. Shep, R.L. (1999). Shirts and Men’s Haberdashery: 1840-1920’s. California: R.L.        Shep Productions.

Carmen. W.Y. (1957). British Military Uniforms from Contemporary Pictures, Henry VII to the     Present Day. London: Leonard Hill Limited.

Covey, L., Ingham, R. (1992) The Costume Technician’s Handbook. New Hampshire: Heinemann  Education Books Inc.

Good-Music-Guide (n.d.). Igor Stravinsky- The Soldier’s Tale. [online]. Available from:    www.good-music-guide.com/reviews/081_soldiers_tale.htm.

History in the Making. (2011). Historical Reconstruction Specialists. Research re-created WW1    trousers. 13th October.

Howard, P. (2011). Costume with Performance Design. Arts Institute at Bournemouth. 1 November.

Jno. J. Mitchell Co. (1990). Men’s Fashion Illustrations from the Turn of the Century.         London: Dover Publications Inc.

Leggings and Puttees. (n.d.). [Online]. Available from: http://www.aef-doughboys.com/leggings.html. [Accessed 4 December 2011].

Liddle, P. (1979). Testimony of War 1914-1918. Great Britain: Butler and Tanner Ltd.

Masters, J. (1965). Fourteen Eighteen. London: Michael Joseph Ltd.

Oliver, J. (e.d.). (1995). Everyday Fashions 1909-1920 As Pictured in Sears Catalog. New York: Dover Publications

Shep, R.L. (1998). The Great War: Styles and Patterns of the 1910’s. California: R.L. Shep Productions.

Wombell, P (1981). Battle Passchendaele 1917: Evidence of War’s Reality. London: Travelling Light Photography Ltd.


Image References:

318th Infantry Regiment 80th Division, AEF (n.d.). Putting on Puttees. [Online Image] Available from: http://www.hardscrabblefarm.com/80th/putting_on_puttees.htm.  [Accessed 4 December 2011]

Front Cover of Histoire Du Soldat. (n.d.) [Online image]. Available from:
[Accessed 18 October, 2011].

Imperial War Museum. Puttees (long), O/Rs. (n.d.). [Online Image]. Available from: http://www.iwm.org.uk/collections/item/object/30100757. [Accessed 23 November 2011] Catalogue Number: UNI 12827.

Imperial War Museum. Puttees, Khaki, Other Ranks (British). (n.d.). [Online Image]. Available from: http://www.iwm.org.uk/collections/item/object/30100384. [Accessed 23 November 2011] Catalogue Number: UNI 12583.

Imperial War Museum. Puttees: M1912, Dutch O/Rs. (1912). [Online Image]. Available from: http://www.iwm.org.uk/collections/item/object/30100780. [Accessed 23 November 2011]  Catalogue Number: UNI 12853.

Leggings and Puttees. (n.d.). [Online Image]. Available from: http://www.aef-doughboys.com/uniformphotos/Puttees.jpg. [Accessed 4 December 2011].

Leggings and Puttees. (n.d.). [Online Image]. Available from: http://www.aef-doughboys.com/uniformphotos/Woolwraps.jpg. [Accessed 4 December 2011].

M.J. & Co. , Checked Waistcoat. (1910). [Online image]. Available from:
[Accessed 10 October, 2011].

National Library of Scotland. Soldier’s Comrades Watching  Him As He Sleeps. (n.d.). [Online Image]. Available from:


Poole Lighthouse Theatre. (n.d.). [Online Image]. Available from: http://www.tourismleafletsonline.com/theatres/Poole-Lighthouse-Theatre.jpg. [Accessed 15 October 2011].

Still from ‘My Boy Jack’. (n.d.). [Online Image]. Available from: http://images.movieplayer.it/2009/07/29/daniel-radcliffe-con-altri-soldati-in-una-scena-nel-film-my-boy-jack-125718.jpg. [Accessed 27 November 2011].

                                            
Whitaker & Co. Inc. Cream Waistcoat. (1916). [Online image]. Available from:
[Accessed 10 October, 2011].

Breaking Down: Part 3

At my dress parade I was asked to break down the trousers more than they already were. It was suggested that I press and steam them to kind of stretch them out, possibly sand them to make them look worn out in places, and to spray into them a little more. To stretch them out with steam I put the trousers on a form with legs and wrapped them with the putties like I would have on my actor. And in my fitting I had marked with safety pins exactly where Josh's knees were so I could get the right area to focus on. My process for the steam was to spay a light mist of water and then blast with steam and then too pull and scrunch the fabric while it was still warm and damp. I do think this loosened up the fibers and stretched out the trousers more, especially around the knee. Next was to use sand paper to roughen up the edges and places that would be worn down. I was really skeptical of doing this because with the cheese grater it kind of just pulled out fluff without creating a visual affect. The sand paper did work better with enough concentration. The main areas that were sand-papered were the knees, bum, pockets, waist line, and button stand. Hopefully this roughing up will be easily seen from the audience.
Back After steaming and sanding 

Front After steaming and sanding
Close up of back after sanding
My next step after this was to just go back in with a little dye and darken up the knees. My tutor suggested that I put the trousers on legs, and then wrap the putties and just spray where they fall and don't flatten out creases; just to let them hang as they would one a body.

Knees after being sprayed into

Trousers after being sprayed into
Evaluation: Working on the breaking down one more time before they go on stage was a good thing. After seeing the trousers under the lights and on my actor I could see where they needed a little more attention. When I sprayed into them this last time I put more dye than water into the air-brush, unlike when I had previously sprayed and filled the jar equally with dye and water. I think that if I had been a bit bolder and used stronger dyes they would have broken down more before the dress parade. I now know that for stage lights going a little extra in the breaking down than you normally would will probably look just about right.

Monday, December 5, 2011

Dress Parade

Today was the dress parade for The Soldier's Tale. A dress parade is something that, I feel, is particular to a live show. It is where the makers, actors, make-up team, designer, director, supervisor, tutors and crew get together to bring the costumes together. It was extremely rewarding to have all four makers there and to see all the actors dressed in full make-up all at the same time. On all the other project I've worked on here there is a second fitting and then the costumes are put on forms for hand in and then worn in the performance. This was a great time to see everything come together, everyone's work to be seen, and for sneak peek into what the final show (or at least the costumes) will look like. This was also an opportunity for there to be any last minute changes or alterations.

The Soldier:
First to be dressed was Josh who plays the Soldier.

Back View

Front View

Wrapping the Puttees

Soldier with Jacket On

Soldier Without Jacket, but Hat On

Close up of Puttees
Evaluation: This was the first time I have seen the costume all put together and being worn by the actor it was made for. I am extremely proud of what I have made. I was apprehensive at the start of this project but I am happy to see it come together. Josh seemed very comfortable when he put his costume on and as the parade continued he did some movements and danced a little and he said it was comfortable for that. I was happy with the proportion of the trousers to the shirt and how the puttees created a little volume around the knee. For the puttees Josh was given long socks to wear. Initially when he got dressed they tucked the bottom of the trousers into the socks and then we tried wrapping the puttees around that. However that seemed to make the putties look bulky and not tightly wrapped (see Close up of puttee, left leg is the one that is tucked into the sock, the other is with the sock underneath.) The better solution was to put the sock under the trousers and wrap the putties around the trouser leg. I think it was a good thing to try it both ways, especially with the designer and supervisors there. If this was a travelling show, as a maker I would want to work with the supervisor before sending the costume off to figure out things like this. I do wish his shoes had come so I could see how the puttees worked with the shoes, but I am going to try and go to the tech rehearsals to see how the costume works during the performance. I think one of the things I was most surprised about was how much the shirt and it's alterations changed the look of the whole costume. I think it really pulls it together and completes Rose's design. The smaller collar no longer swallows his neck and still looks like the casual simple shirt I was aiming to create. The washing and breaking down I did makes it look soft and lived in. Re-working the shirt was a good experience that taught me to constantly reference the design, pay close attention to proportion, and never to be intimidated by big changes. I am going to wash the shirt again before I turn it in just to break it down a little bit more, but as Josh wears it for rehearsals and performances and it is then washed again and again I think it will continue to look lived in. I am also very pleased with my trousers. I think they fulfill the historical and character aspect of the design. Rose was particularly happy with the trousers and how they looked. The director and my tutors did suggest breaking it down more. Using the iron to really press it and wear the fabric down as well as maybe adding more dye. Seeing it under the stage lights some of the breaking down and dye doesn't really show and I agree that it could use some more distressing. The coat and hat were sourced from the National Theatre Hire House and really complete the look of a soldier and are a good match to the fabric used on the trousers. There are just minor changes with the Soldier's costume. The director and designer are pleased with how it all looks and so am I.

The Narrator: 
I also had my waistcoat to show in this parade and it is worn by John.
Waistcoat Front

Waistcoat Back

Waistcoat with Hat and Jacket
Evaluation: Just like the Soldier's costume I am extremely proud of how the waistcoat looks and fits. The lengthening of the straps in the back really make it fit well without pulling too much. And with the buttons on the stripes match up perfectly on the front. I found tailoring this waistcoat to be very challenging for many different reasons like the checked pattern and weight of the fabric. Overcoming these challenges makes the finished product even more rewarding. I wouldn't say I learned many new processes making this waistcoat but I have certainly improved my specialist skills. If asked in an interview or on the job if I could tailor a waistcoat I can say with confidence that I have after completing my second checked waistcoat for this project. My only adjustment is to just give it a very good press and it will be ready for the show!


Sunday, December 4, 2011

Puttees

Once my puttees were broken down I decided to do a bit more in-depth research on them. I haven't really done this before now because I had seen them in all the pictures and research of WW1 army uniforms and until this point they had given me all the research I needed. However I wanted to search how to wrap them and if there was anything unique in how they were attached or finished.
My research into the puttees led me to the website of the Imperial War Museum where I was very lucky to find these images, which are an excellent source of research.
Imperial War Museum. Puttees: M1912, Dutch O/Rs. (1912). [Online Image]. Available from: http://www.iwm.org.uk/collections/item/object/30100780. [Accessed 23 November 2011]  Catalogue Number: UNI 12853.

Imperial War Museum. Puttees, Khaki, Other Ranks (British). (n.d.). [Online Image]. Available from: http://www.iwm.org.uk/collections/item/object/30100384. [Accessed 23 November 2011] Catalogue Number: UNI 12583.

Imperial War Museum. Puttees (long), O/Rs. (n.d.). [Online Image]. Available from: http://www.iwm.org.uk/collections/item/object/30100757. [Accessed 23 November 2011] Catalogue Number: UNI 12827.
These three images gave me a much better understanding of puttees and how they were made. I hadn't realized how the cotton tape was attached and these three images were very useful in finishing off my puttees to a historically accurate level. 
Folded in edge and unfinished edge 
Slipping in the cotton tape then folding it over and stitching over top

Two finished under-sides

Two finished on the right sides

Finished puttees with name tags
Creating the ends of the puttees was very easy. Since I didn't have instructions I looked at the images from the Imperial War Museum and made up my own process of making them look like they did then. First I created a triangle by folding in both ends then top-stitched close to the edge around the point. Then I laid the  cotton tape right side up so the end tucked under the folded corners of the puttee fabric. Then without pulling the end out folded up the cotton tape so it hid the two edges of the folded in puttee fabric. Then tacked down the cotton tape in a rectangle around the edges so I would have a guide when I machined from the right side. Then machine stitched the box with the X. And to finish I stitched a straight line completing the triangle and catching the puttee fabric and the cotton tape.

Evaluation: I think this finishing really adds to the look of the puttees as an historical replication. Finding the images from the Imperial War Museum gave me the information I needed to finish them professionally. And I feel now that they will be easier to wear for my actor and function more like they did for the real Soldiers of WW1. 


How to Wrap Puttees

Before the dress parade I also wanted to research how to wrap the puttees. I discovered that there are many different sites for people who are re-enactors or just history buffs and these sites and discussion boards let me to this website: http://www.hardscrabblefarm.com/80th/putting_on_puttees.htm
This site has a great tutorial on how to wrap puttees. I've taken note of some of the images and directions to take with me for the dress parade. I also found these images that I thought were helpful and interesting for puttee research and is my goal for wrapping the puttees tomorrow:

Leggings and Puttees. (n.d.). [Online Image]. Available from: http://www.aef-doughboys.com/uniformphotos/Puttees.jpg. [Accessed 4 December 2011].
 Puttees Before 

Leggings and Puttees. (n.d.). [Online Image]. Available from: http://www.aef-doughboys.com/uniformphotos/Puttees.jpg. [Accessed 4 December 2011].
Puttees Properly Wrapped

Saturday, December 3, 2011

Breaking Down the Shirt


Breaking down the shirt had a bit of different process from the trousers and the puttees. I basically started breaking them down before I even cut them out. As in a previous post I had planned on doing a 'dirty-water dye' but then couldn't get the results I was looking for so instead I pre-washed the fabric before I cut it out. I learned then that the fabric wrinkled very easily, but for this project that wasn't necessarily a bad thing. In my discussions with Rose about breaking down she had specified that the shirt didn't need to be as grubby as the trousers and puttees. To me this makes sense. The shirt would probably be the easiest thing for someone in the woods to was regularly and if he was wearing his coat over his shirt most of the time then that would take most of the heavy dirt as well. What  I was looking to do was just to make it looked lived in. Wear down the parts he would use the most: collar, button stand, cuffs, and elbows. Add some sweat stains under the arms and maybe a drip or a spill here and there. To build up this worn look I knew I would need to wash it a few more times. After I had finished making the shirt I put it in the washer and conveniently a load of whites leftover from a previous show also needed to be washed. This was good in my mind because even if it came out still looking white mixing with other fabrics and textures would help the breaking down. Then the shirt was worn in the woods and got very dirty around the cuffs and elbows. I was happy to see that when this was washed not all the stains came out, and better yet, they had set in more. When I went to air-brush my puttees and trousers I took my shirt with me. I took the medium brown and watered it down to be very very light. I did some spraying under the arm, around the collar and the button stand. It didn't really show up very well, but I didn't want to spray too heavily and make very intense under arm sweat so I left it to show Rose.
Some results of airbrushing on the first day


Some results of air-brushing on the first day


I showed the shirt to Rose along with the puttees and trousers. She was happy with how it was looking broken down so far but she said it could still use a little more work around the neck and the arm-pits. I was glad for a second opportunity to work more on the shirt. I diluted my dyes like before but not so much as the previous time; just to see the different results. This second time air-brushing was successful and broke it down a little more but not in any way to an extreme. Again I focused on the under-arms and around the collar. I also did a light mist the whole way down the buttons stand and a little mist around the back around the collar. I rolled up the sleeve and sprayed that as it was rolled just to give it a subtle variation. 
Air-brushing on a rolled cuff
Me air-brushing the shirt

Shirt before Dress Parade
Evaluation: I am very happy with how the shirt is finished for the dress parade. I think the dyeing is very subtle, but hopefully still noticeable. My main goal with the shirt was to make it looked lived in and between washing it and a light spray of dye I think that has been accomplished. Again I am excited to see how it looks on my actor and under the lights. Working on the shirt also showed me the versatility of the air-brush; by just diluting the dye a bit with water it changed it's affect on the costume in a positive way. 


Breaking Down the Trousers in the Studio: Part 2

After my new experience of air-brushing and breaking down I showed Rose my trousers and putties from the previous day. She was pleased with the progress on the breaking down. She said that I didn't have to do much more on the trousers, and it might be worth it to wait and see what they say in the dress parade. However she did say that the putties might need more work, and I agreed. She suggested putting some splatters on them as well, which is something I hadn't really thought of. I used the same dye as the air-brushing to make the spatters so it stayed in the same dye colour range and simply flicked a small paint-brush over the putties to look like drips and splatters. 

Putties drying after splattering and more air-brushing.
After creating the spatters I wanted to make sure they blended in and didn't stand out too much. I also thought they should be a bit darker since they would attract the most mud and dirt. I am pleased with the putties after being broken down. I think they are very successful. When I was dying these I had done a little research on the putties and remembered them tying with a string on one end. I decided to dye some cotton tape while I was in the dye room to make sure I had everything I would need and that it would be the same colour/fit in with the puttees.These are the lengths of cotton tape I worked with and I am pleased with the end result. I think it will blend in and be very functional with the puttees.

Cotton tape 
Cotton tape dyed


Close up of air-brushing on trousers

Close up of air-brushing on trousers
After finishing the puttees I brought up the trousers again to do just a little more air-brushing. This time I didn't put them on the legs, instead just laid them flat because I wanted to target certain areas. I focused on the waist line, the pockets, and the button front. I didn't make the dye very dark (added more water than dye) because I didn't want it to be too bold of a difference.

Soldier Costume before the Dress Parade

Close up of trouser leg and puttee before Dress Parade. 
Evaluation: I think this second day of breaking down was very productive. I am much happier with the puttees now that they are darker.I think it will add more to the trousers and the over-all look. Adding the splatters really make a difference and I am pleased with how they look. The trousers I am also pleased with. I am apprehensive to see how they look on the actor and how they look under the stage lights. I've never under-taken a large project of breaking down before I didn't want to go too over-board before seeing everything on the actor. I can easily tell where I've been breaking down, but that is probably because I am working so closely on each piece, I am ready to hear what they look like to a different audience.

Friday, December 2, 2011

Breaking Down the Trousers: In the Studio Part 1

After the journey of running through the woods I was ready to do some more breaking down in the studio. It was really helpful having a good start and a few key areas to focus for the most impact. I did some experimenting with a few more common breaking down tools on the trouser fabric but had only so-so results. I tried oil, coffee, tea, hair spray, spray butter, nail-polish remover, and some cheese grating. In some cases these techniques left no real affect on the fabric, they kind of disappeared when they dried. I was expecting a lot from the cheese grater however it took off the first layer in large amounts of fluff but didn't create a result that looked like it had happened over time. I knew I would need to do something a bit different to get the best results. What my teacher had suggested was to try and get a general feeling of mud and dirt; not just big clumps. To get an even spread I should use an airbrush filled with dye to get the right affect. With some help from the technicians I got a little airbrush and mixed up my dyes. I mixed up three colours, a dark almost black brown, a lighter mid-tone brown and a kind of light savanna type brown. I tried each colour on both my trouser fabric and my puttee fabric. I was absolutely thrilled with the results.
First results with the Airbrush and dye
Using the airbrush really gave the fabric a nice tonal difference and variation. This was successful when considering maybe the Soldier had tried to wash his trousers a little or at least tried to keep them as clean as possible, but time just kind of wore them down. It's especially noticeable on the puttee fabric. I was worried it was going on a little too dark but by just dabbing it with a cloth of the same fabric or rubbing the piece together it spread the dye around and fixed it more into the fibers so it didn't look too heavy in any one place. I took my samples to show Rose and my tutor and they both liked the effect but we decided to get rid of the lightest more red brown because it stood out a little too much. When I got back to the dye room I added some more green to the lighter brown and made it more of a deep/gray green which I used as a base for my puttees.
Trousers Front
Trouser Back
Knee Close Up
This was a very fun process. I was able to put the trousers on a pair of legs in the studio and that was very helpful to have them to work on. I mostly focused on the knee area and the back (bottom area). I also did a little bit of work around the top of the trousers, the button stand where it closes, and the pockets on the side. I felt like along with the knees and bum these areas would also get dirty just from everyday wear and tare. I did rotate my colours and did use a cloth to go back in and work the dye into the fibers. I think this technique worked really well. For the puttees I just did a spray with each colour to build up the dye. The lightest layer was the green, then a little more heavy was the medium brown, and the heaviest and the darkest was the last dark brown. Instead of using a separate piece of cloth I would spray the dye and then just rub together a different part of the puttee together with the part that had the dye on it. This seemed to work efficiently because it spread the colour and worked it in at the same time without needing a second piece of fabric.

Evaluation: Working on breaking down has been a positive learning experience for me. I learned a new technique (airbrushing) that I really enjoy doing and that is very useful. Airbrushing produces a different type of breaking down but I can also see it being useful for many different types of textile manipulation and am interested in experimenting with it more in the future. Again having the base of real mud to work on is very very useful and I feel more confident in what I am doing because I am keeping the continuity from yesterday. I will be interested to see what Rose says tomorrow and then to see how they look in the dress parade and under the stage lights.


Wednesday, November 30, 2011

Initial Breaking Down: Out in the Woods

  It was suggested by my tutor that when my trousers were done and ready to be broken down to go and run around the woods and play in the mud, because real mud is better than fake mud. I was apprehensive to say the least; here was the labor of several weeks about to get mud on them. Luckily I had some help from my friend (and in my opinion someone who is particularly good at breaking down) Ellen. So here is the start of our breaking down journey in Merrick Park.
At the start of the journey when they were still new and shiny
We were lucky that it had been raining on and off for the past few days so there was mud and wet leaves and grass around that would help create the effect we were looking for. 

Ellen climbing up the hill through the leaves in mud, working earth into the knees. 
  On this journey we tried to think about things the character of the soldier would be doing. Him walking on his knees up-hill might not seem entirely realistic but he would have been up and down on his knees getting water or picking things up and because the knee is an area that gets used a lot it would attract things like mud and dirt. We also tried just sitting in the grass, like he would when he needed a break, or lying on his back and resting.
Here with the first results of our journey, the beginnings of  the dirty knees

I had brought the shirt with me but I wasn't entirely sure if I was going to have Ellen wear it or not. I think it was a good choice for her to have it on. Even though she wasn't literally rolling in it, just doing normal things I was surprised at how dirty it got.

Adding the shirt to the mix
One of the first thing Ellen did when she but the shirt on was to sit back down in the grass then prop herself up on her elbows for a little and then lay on her back. I wasn't expecting to see grass stains and dirty elbows so quickly in just one action but that's how it happened. It's easy to see how quickly the soldier could get muddy and grubby if he was wearing this shirt everyday. However I also wanted to be mindful that he would be wearing his jacket over his shirt at some points and that the shirt shouldn't get too grubby.

Relaxing but working in the stains at the same time
One of the other things Ellen and I came up with was to try and touch places that would have gotten worn by sheer use. Such as the pockets on the trousers, the fly front, the collar and buttons on the shirt, and the cuffs. Ellen would rub her hands in the mud and then wipe them on the front of the trousers just like she would if she were in the words and tripped or got her hand dirty.

Other adventures: sliding down a hill
Army crawling up hill 


We tried many different things like sliding down hill and army crawling up hill, leaning on trees, sitting on old logs, ect.


Our final result
Evaluation: I feel like this was a step in the right direction for my breaking down and a great first experience in breaking down to have. It was really helpful having someone actually moving around in the trousers and seeing them on a body, how they react to different movement. It was also an easier way to transition the protective maker into breaking down her own costume. Imagining the soldier in the woods sitting, crawling, climbing gave me a real live sense of the context of his character. Even if most of this real mud fades away I'll still be able to see the general area it stuck too and the areas that got the most grubby. It is a beginning template for a realistic breaking down.

Sunday, November 27, 2011

Breaking Down Research

Here is some of the research I gathered before starting the breaking down process:


Still from ‘My Boy Jack’. (n.d.). [Online Image]. Available from: http://images.movieplayer.it/2009/07/29/daniel-radcliffe-con-altri-soldati-in-una-scena-nel-film-my-boy-jack-125718.jpg. [Accessed 27 November 2011].

I felt like this was a strong image because it is in colour and is from a film set in WW1. The breaking down, especially on the trousers, is really intense. It is obviously raining and muddy and extreme. I won't be taking my trousers this far because the character hasn't really been in the trenches. He is more of a deserter and a wanderer. 

National Library of Scotland. Soldier’s Comrades Watching  Him As He Sleeps. (n.d.). [Online Image]. Available from:

I also find this image useful in gathering breaking down information and kind of a general feeling for the character of Soldier. His relaxed position and the feeling he is young and not so aware is good for the character of Soldier. Even though this picture is in black and white it still gives a lot of useful information on where things were broken down ans what got the most muddy and the dirtiest.
Covey, L., Ingham, R. (1992) The Costume Technician’s Handbook. New Hampshire: Heinemann  Education Books Inc. 
These two images/scans are from a costume book and have some useful text about breaking down. Although I  might not use every technique mentioned it is a good starting point to get me thinking about how to start.