Showing posts with label SDP. Show all posts

Sunday, May 15, 2011

Final Evaluation

For my Self-Directed Project I made four garments for the National Theatre Hire Department. This was a good opportunity to experience what it would be like working in a professional work room, become more confident in my sewing abilities, and to create and manage my own time plan.
                Working on a project like this was a valuable lesson in planning both long term and weekly, even daily. In the beginning I created a calendar for the length of the whole project, planning out when I would start and, hopefully, finish each project. I tried to be thoughtful when planning out the length of each garment so I wouldn’t feel rushed and I was able to stick to my time plan successfully. I finished my breeches and almost my entire waistcoat before Easter Holiday began. And although I switched the two shirts around I was able to finish two days before the original hand in. This schedule would not have been successful though if I didn’t have a weekly/daily plan as well. In general I made sure I came in for 9.30 every day that was scheduled and on days the studio was open. If I felt I was behind I tried to stay for late night study to compensate. By planning my own scheduled I learned more how to manage my time for a longer project and to stay focused every day.
                Experiencing a work room setting was a huge part of this project and an aspect I was very interested in for a potential future job. I really enjoyed the regularity of coming in every day and sewing and the community feeling of everyone working to complete a project. One of the biggest problems and adjustments was not being in charge of our own supplies. I’m used to bringing in what I will need for the day, both fabric and sewing kit. However our supervisors were in charge of all of our materials. I did think they did a good job but could have been more prepared. At the beginning when we all started working on the breeches they still didn’t have the canvas or the Silesia we needed for the pockets and waistband. This caused us to cut into fabric that was originally intended for a waistcoat and make do with a different canvas than what was ordered. Things like lining and Silesia could have been one of the first items to be ordered because they weren’t necessarily seen on the outside. However, just like in any work room, adjustments can be made and solutions were found for these problems. Another initial adjustment was figuring out the balance of how to make these garments. We had many resources to look at like: our previous class instruction, the garments provided by the National, the National patterns, and our tutor. I found it challenging at first to know what to look at when I had questions or when I wasn’t sure how something should be put together. I feel I was able to find a successful mix between all these different elements. Instead of just going head first into each garment or process taking the time to look over the example garment, write out my own instructions and then talk it over with my tutor seemed to be a very successful blend. This gave me the opportunity to figure out how I would make it on my own and then talk it over with an instructor who could give me advice, suggestions, and make sure there wasn’t anything I had left out. It taught me to look a few steps ahead but also made me feel more confident in my abilities to put a garment together independently.
                I’ve learned a lot while making these four garments and learned and perfected many processes; and that has made me a more confident maker. I feel like now I could go into a work-room on work experience or an internship or job and feel like I could make any one of these garments. For each garment there were certain challenges. For the waistcoat and the breeches it was putting in the pockets, only on type (the welted pocket) I had made before so the other two were new processes. The pin-tucks on the blouse and deciphering the pattern for the shirt were also challenging. Overall keeping the garment neat and not over-worked was one area I worked hard on but that I still could improve. Keeping the garments neat and the work space neat are important lessons learned from this project.
                I feel like I completed the goals set out in this project through keeping to my time plan, learning to work successfully in a work room, and learning new and perfecting old processes. 

Wednesday, May 11, 2011

Shirt Evaluation

Finished Shirt Front


Finished Shirt Back
I am very pleased with how my shirt turned out. I think this was good last garment to make because I did it almost entirely on my own and I was able to draw on things learned from the previous garments I made. The challenges I overcame for this shirt were figuring out a different/difficult pattern, putting in a button stand, and thinking a couple steps ahead throughout. I did have a small tutorial on the button stand with my tutor but most of the information and instruction came from looking at the example. Looking at the shirt now I think I would have made the button stand a little longer. I think maybe going in between the 8” it said on the patter and the 14” from the example would have been a good compromise between the two; and it would have allowed me to put in an extra button or two. I also am very happy with my time management on this this shirt. I started it on Monday May 9 and completed it on Wednesday May 11. That was very close to following my time plan. It was pretty much the same amount of time originally scheduled just in a different week. This will also give me an opportunity to go back and see if there is anything other garment that needs a little re-touching before hand in. I think working on this shirt was a good independent working experience. I was able to talk to my tutor when I was unsure but I also tried to work as much independently as I could. I feel like this is more like a real work room and hopefully the amount of time it took is a bit closer to what it would take in  a real work room. 

Tuesday, May 10, 2011

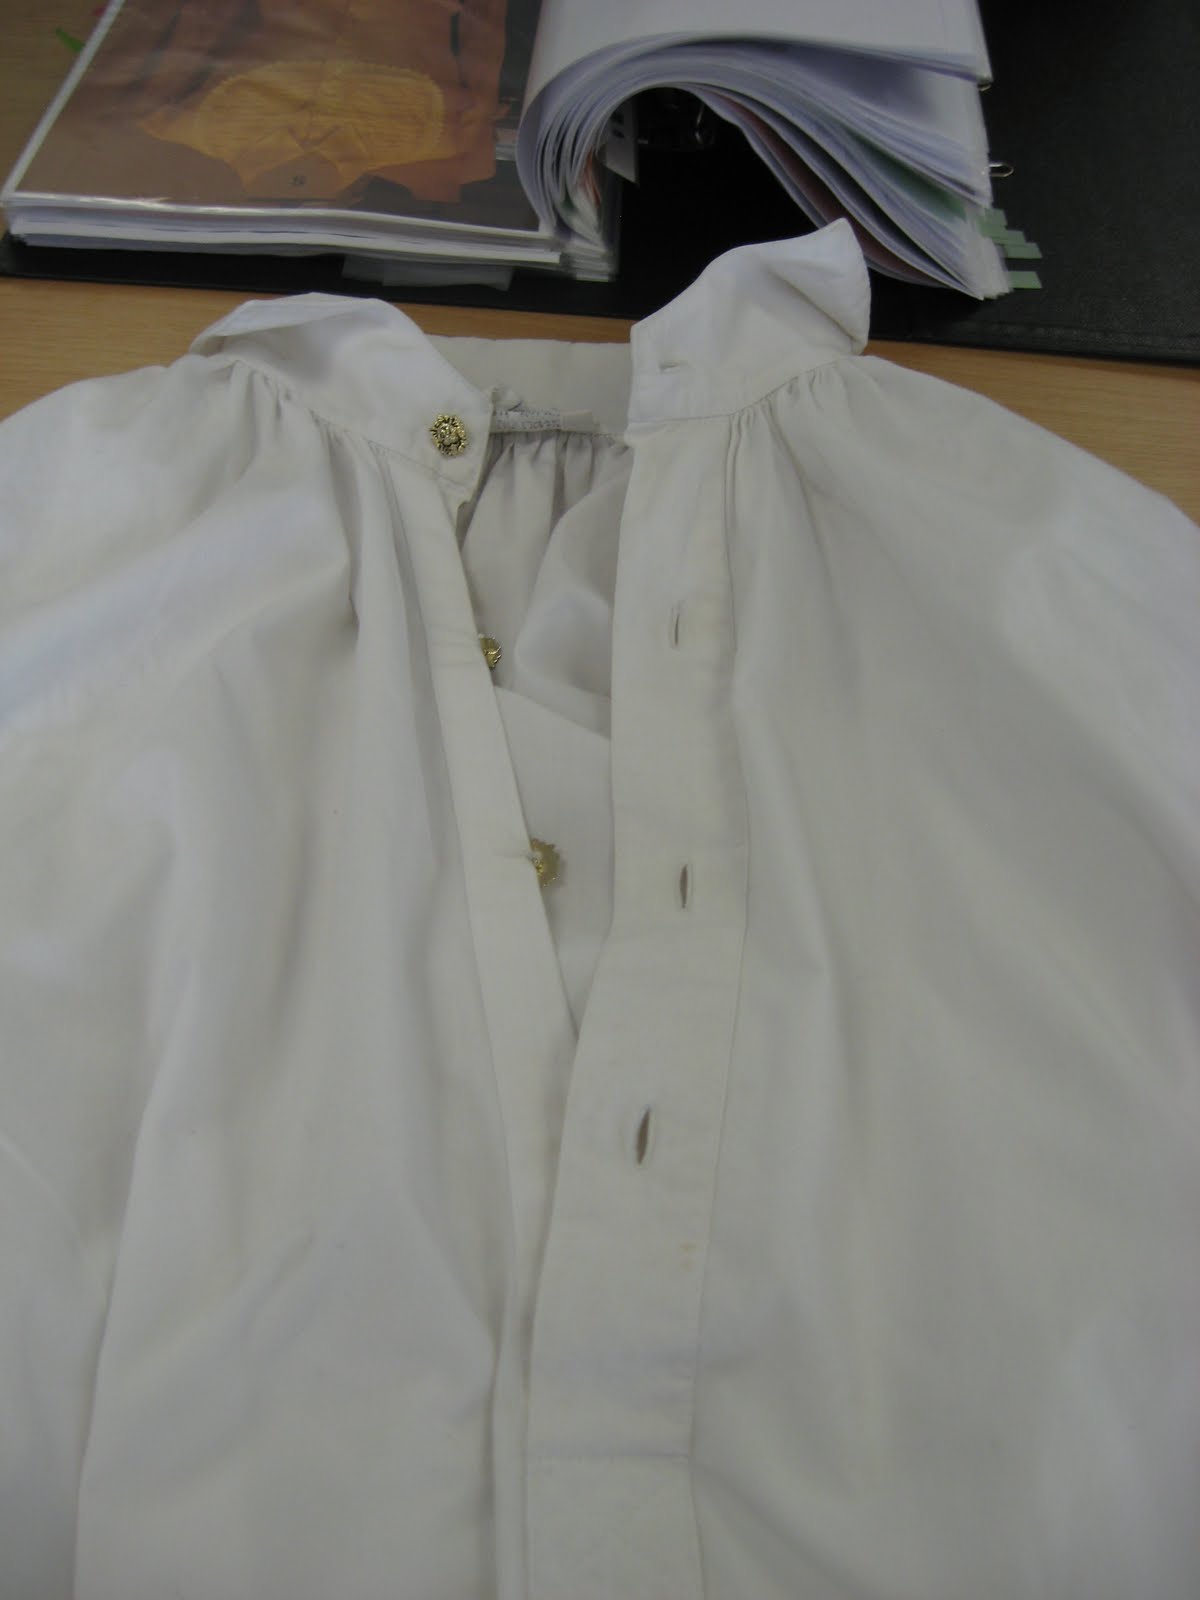
Shirt Button Stand

Original Shirt from National Theatre Hire Department


My finished Button Stand
Probably the most challenging part on this shirt so far has been putting in the button stand. It is both similar and very different to the placket we learned how to put in, in fundamental studies. It is different because it is not on a seam and therefore has no seam allowance. It is more similar to the how we made the points on the breeches or the sleeve openings on the blouse. I inspected the example for a while and decided to try a sample on my how to see if I could deduce how it was made. This was semi-success and I showed it to our tutor who said it was close but not quite. He gave me a few more instructions and I tried a second sample. This was also not perfect but I better understood how to do it and felt confident to try it on my shirt front. I am happy with how it has turned out. However I was confused about the length it should be. On the pattern/graph we were given it said the opening was 8” however I measured the example and it was 14” which is a huge difference. This is one of the challenging things about working from a pattern that is a little different from the shirt. I decided to go with 8” because the pattern is what we were mainly to be working from and I figured that perhaps the shirt was just the closest they could find to the pattern. Creating this button stand was useful because it is a similar process to things we have already made but it is a variation and it is definitely building my repertoire of different things I can do. 

Putting the Shirt Together

Putting the shirt together is a relatively speedy process once the pattern pieces are cut out. By looking at the example shirt I can gauge how to construct it fairly easily. What was helpful was taking a moment before I started sewing to make a kind of plan for myself of how to approach making the shirt. First I started by making the front and then planned on making the sleeves and then putting it all together. Taking a moment to look over the example I made plan of action I made little notes like this:
Sleeve Opening on front is 13”
So sew up the sides 13”from the top plus s/a
Do shoulder seams 2” from the neck end
Insert triangle at neck, over-locking before hand
Cut down front to put in button stand
Ect…
This made things easier when I started putting things together because I already had a thought out list to look at and I think that really helped speed up the process. Being able to plan and think ahead is really coming in useful for making this shirt. It is a good thing to have to think about. ‘Do I need to over-lock this edge before I sew it, how much seam allowance do I need, if I put this in first will it be in the way when I attach it to..?’ This shirt is becoming a good exercise in thinking ahead. 

Monday, May 9, 2011

Shirt Pattern

Originally Diagram given by The National Theatre

My re-drawn diagram with calculated measurements
Today I began cutting out the male shirt for the National Theatre Hire Department. This was a completely new process for me since there was no pattern, but rather a graph as our pattern. Deciphering this graph proved to be the hardest part about cutting out this shirt. There weren’t many measurements or formulas to figure out the measurements. Some of the bigger pieces like the shirt front and sleeves were given as approximately finished sizes but only horizontal estimations not vertical. It was also difficult because although it was drawn on graph paper it wasn’t scaled down exactly. Meaning that they wrote the finished sleeve should be approximately 20 inches but the sleeve on the graph took up about 23.5 boxes. So I couldn’t even count the boxes to get the measurements. Instead I decided that the sleeve piece was a square so it was labeled as approx. 20inch when finished so it was a 20” by 20” square. Using that I gauged the rest of the pieces using how they related in size to the sleeve. As well as taking measurements from the finished shirt we were given as an example I drew out my own graph to cut out my pieces. It was a simple series of cutting squares and rectangles after that. 

Blouse Evaluation

Finished Blouse Front


Finished Blouse Back
I am very proud of my blouse upon its completion. I naively thought that this would be one of the easier garments to make for the National. However I encountered many challenges to overcome throughout, from simple mistakes to testing out a new process. Probably my biggest mistake was made in the very beginning when I was cutting out the pattern, and that was cutting two of the same sleeves. I must not have flipped my pattern the second time which is a peril when cutting out with just one layer of fabric. I was lucky enough to have enough fabric to cut out a third sleeve and all that was lost was time. This mistake will make me more aware the next time I cut out on just one layer of fabric. I think it will also help me be more aware of marking the right and wrong side of the fabric. In the case of this blouse the black fabric I was using was similar on both sides; maybe that contributed to the mistake as well. Another challenge I encountered was making the slit at the wrist of the sleeve. It was a relatively new process and it took me some time to really do it correctly, but that something that I can now feel more confident in doing again. One thing I did feel was a success was the pin-tucks on the front. Using chalk that didn’t leave marks after ironing was a good solution to working on black fabric when the garment wasn’t going to be lined. I really wanted to make sure the blouse looked as clean on the inside as it did on the outside. Using lots of tacking was also key to keeping things tidy, I discovered that it took a lot less time to mark tack something than to try and remove chalk lines. I am very happy with the quality of this shirt as well as the amount of time it took me to make it. I started on Thursday April 28th, when I was originally scheduled to start the male shirt. I finished the blouse on Monday May 9th so a little over a week like originally planned. I did utilize the weekends but tried to keep that at a minimum. I feel that in a professional work-room if I was given a similar blouse I would be confident in making it.  

Sunday, May 8, 2011

Improvements on the Blouse

I feel that making this blouse has been an important learning experience in gathering knowledge from the example provided, using the pattern, and using knowledge from our previous units. There are a few little things I did differently on this blouse than how they were done on the example. 
The Center Back:
The center back on this blouse holds the buttons and button stand. It is a part of the blouse that needs to be strong and durable. On the example given to us by the National the button stand is left unfinished with the raw edges showing on the inside. It is already starting to fray a little, something I wanted to make sure and avoid. Following the guides on the pattern I made the seam allowance and the width of the finished button stand the same so that when I folded it over to form the button stand it, essentially, has three layers of fabric underneath it to add to the strength. On the first fold over I did a machine stitch line about 1/8th inch away from the edge. It is folded again and then was tacked in before the button-holes were done to secure it. On the button side everything was done the same except that I also did a machined line between the end of the button stand and the row of buttons. Just to make sure it didn't move but I also made sure it would be covered up by the button-hole side when buttoned. I feel like these are all good improvements to the center back button stand using the pattern directions and fundamental studies techniques. 
Top Stitching vs. Hand Sewing:
This is a very important change from the original to the blouse I made. Much of the example was top-stitched using a machine. This could be for a number of reasons, but most likely is that it was done for speed. I used a mix of top stitching and hand-sewing. On the cuffs and collar instead of top-stitching close to the seam I slip-stitched the collar lining inside so there is no top-stitching required. But on the hem I used a machine stitch close to the edge. A hem stitch or slip stitch would still leave marks on the fabric so it was decided that a straight stitch would be better and could count as a design decision. I think this mix of hand sewing and machine sewing was effective. I'm not sure how long it would take to make this blouse in a work-room but I felt like the hand-sewing didn't take any extra work and for me it produced neater results. 

Friday, May 6, 2011

The Third Sleeve

Today I discovered a mistake I had made in the very beginning of making this blouse. I cut out two of the same sleeves. It is a common mistake when cutting out patterns on one thickness instead of two. I do think for smaller garments that cutting out on single thickness can be neater but it runs at a high risk. This is also a devastating discovery because I have already put the cuffs on both sleeves. Luckily I have enough fabric to cut another sleeve out and the cuff doesn’t need to be re-made just taken off the incorrect sleeve and put on the correct. This also gives me a chance to re-make my sleeve opening at the cuff with a little more accuracy, since I’ve practiced on the other two sleeves. This is a set-back that could mean a change in my time plan. In a work room this would be a huge mistake depending on time and the cost of the fabric. It is a good experience in remembering to take my time on each step and stay focused. 

Thursday, May 5, 2011

Creating the Sleeve Openings

Sleeve opening, first or second attempt


Finished sleeve opening as it should  function

Sleeve opening on a almost put together sleeve
Creating the openings in the sleeve on the blouse has been a challenge for me. After investigating the sample shirt we were given I realized several things about this opening. It did not sit on the seam like I had originally thought and although the example was all machine sewn I (on the advice of our tutor) should use both machine sewing and hand-sewing. This opening was similar to the skirt placket we had made in fundamental studies first year and so I used that basic technique. Evaluating it now, I wish I would have made a sample first just to experience it and work out all the kinks. My first attempt was not a success and my second and third was okay but not great. With a good press they should be fairly neat. It was a worth-while lesson to learn about taking your time and making small samples of techniques you’re not used to doing. 

Tuesday, May 3, 2011

Blouse Pin-tucks

Blouse front with mark tacking


Blouse front with pin tucking and lace
After cutting out the blouse, the first things to tackle were the pin-tucks on the front of the blouse. This is something I had never done before so I made sure to take my time. Since I was working on black fabric  I needed to be careful about my chalk lines and what might show up. I had in my kit, a square of dress-making white chalk (from a previous course) that disappears when you iron it. After a few tests on scrap fabric I discovered that it worked really well (disappeared) on this black fabric well. So I drew on my lines for the pin-tucks carefully using this white chalk. Then I tacked in all the lines with white thread. This way when I went to sew it I could have the white thread as a guide and the chalk would iron out. Although I think this was a successful technique it was difficult to keep the sewing lines straight using only the thread as a guide. Because the stitch was only a simple basting stitch the thread could move quite easily, after doing the first side I discovered that using a guide on the sewing machine and the white thread was a neater approach to creating the pin-tucks. I also made the unfortunate mistake of pressing the pleats the wrong way. Luckily I was able to correct it quite easily and the lace on-top helped it lay flat. I am pleased with how the pin-tucks turned out. 

Friday, April 29, 2011

Waistcoat Evaluation


Waistcoat Front
Waistcoat Back

I am very pleased with my finished waistcoat. This was an interesting garment to make because it was a cross between a tailored waistcoat (like the one we made at the beginning of the year) and a costume waistcoat. I was able to use many of the skills learned in tailoring while making the waistcoat like tacking in the canvas and general techniques for precision and accuracy. I also was learned a different type of pocket for a waistcoat besides a welted pocket. This was a success and after making a sample first I fully understood how to make them on my waistcoat. It was a new skill learned. Just like breeches there is a lot of hand-sewing as well as machine sewing, I think this turned out to be very successful, and I think the stab-stitching is a very neat and crisp way of finishing an edge. One of the areas I struggled with one the waistcoat was slip-stitching around the arm-hole. I think it could have been a little neater and more even the whole way around. I also found it difficult fitting the lining into the waistcoat, once the hem was bagged out, when I couldn’t find a mannequin that fit. These are small challenges I feel I could correct were I to make another period waist-coat. 

Returning from Break/ Next Garment

After returning from a restful break it was back to work on the pieces for the National. First I finished a few things on the waistcoat. The button-holes had been made over the break and part of the arm-hole had been un-done to put those in. So I re-sewed that bit and then finished prick-stitching around the arm-holes and along the hem. It wasn’t a big job, but I’m happy I waited til I came back because I was more focused.

My plan for when I returned and finished the waistcoat was to begin the male shirt, and finish that around Wednesday May 4th. I was hesitant to start the male shirt as planned because our tutor was unavailable for questions and the pattern was something I wasn’t used to. Instead of pattern pieces it was simply a graph without much instruction or guides. I wanted to talk over the process with our tutor before I started but I also didn’t want to waste too much time. So instead I changed my time plan and started working on the blouse, which I wasn’t originally scheduled to start until after the male shirt was finished. On my original time plan I had allowed myself about a week to finish the blouse so I planned to allow myself the same amount of time, just a week earlier. I think this is a good compromise because I won’t feel rushed on the blouse and will still have enough time to make the shirt with a little assistance when I finish the blouse. 

Thursday, April 28, 2011

Blog Tutorial

Creating this blog has been a new technique learned in this project. Today I had a second tutorial about this blog and progress. My first tutorial for the blog was before I left for the holiday break, but it left me more confused about what I was supposed to post and how to label things. In general my lay-out was okay, however my labels were a little unclear. Also my description under the title of my blog should be more clear so that anyone looking at this blog can know what it is about. I needed to add more to my Planning blog post about what this project is really about. All of those things were easy to correct. I added a different description under my blog name that is more clear as well as adding to my original planning post. To make the labels on the side more clear I changed it so along with the general descriptive word first followed by what specifically the post is on. For example: in my research I have the term Research followed by Breeches ( SDP 004: Research: Breeches) This way if someone was interested only in the breeches research they wouldn't have to look through all the research posts to find what they are looking for. What confused me in this tutorial is how to include evaluations on our work. At this tutorial I understood it to be that we were to evaluate every post we make in a separate post and if we make a post that included descriptive and evaluative writing we were to copy and paste that same little evaluation into a separate post. Also that I need to post every day about what I am doing in class. Needless to say I was a little confused.
I was able to have a second blog tutorial today and I was able to go with specific questions about my blog. I think it was successful tutorial because I feel confident in re-arranging and continuing a well organized effective blog. I can continue having descriptive and evaluative posts without having to copy and paste the evaluative parts to a separate post. Instead I need to gather all those mini evaluations and use them to make one cumulative evaluation at the end of the project. Also it is the quality of the blog posts and not the quantity of them that is important. For my project specifically the days that I work sewing using skills already learned are important but not really necessary to evaluate. It is more important when I learn a new process to record it on my blog. With a little tidy and a few technical adjustments my blog is more successful than when I originally started it.

Thursday, April 7, 2011

Waistcoat Review

I had a lot to complete before leaving for my Easter Holiday. Overall I am happy with what I completed. My waistcoat is complete, except for a little hand-sewing. I decided that instead of rushing through the last bit of hand-sewing on the last day I would save it for when I came back and was more focused. I didn't want to rush something and then have it not be neat. I had wanted to completely finish my waistcoat before the holiday but on my original calender I had put finishing off the waistcoat as the 28th (after the holiday), and in that sense I am really sticking to my time table. I was, however, able to fix a few little things on my breeches before I left. I inserted hanging loops and did a few reinforcement stitches around the points and a general press. I'm glad that the breeches are now completely finished and I am happy with how they turned out. I know that when the holiday break is over I will have to be very focused in order to complete everything on time.

Tuesday, April 5, 2011

Waistcoat Pockets

Waistcoat Pocket Trial
This is my example or first try for my waistcoat pockets. I wanted to make sure I did a trial before I worked on my real waistcoat front pieces. This was a new process for me and after having our tutor explain it I thought I should experiment to make sure I really thoroughly understood the process. Unlike the welted pocket and cash pocket of the breeches this cash pocket was as easy as it sounded. Having said that this pocket is not perfect by any means. It is a little too big and obviously uneven. The sides/ends are uneven and is pulling the fabric. This trial run was such an important step for me do before starting the real pocket. It gave me the chance to try without the fear of failure and helped me better understand elements of the pocket like the pocket bag size and the size of the mouth.
Finished Pocket on Waistcoat
Finished Pocket Flap on Waistcoat
These are the finished pockets on my one side of my waistcoat. They are much more successful than the initial try and I am very pleased with the result. I think this pocket is much neater and more even. For things like pockets, especially when they are new, it is so useful and helpful to create a sample first. It is something that I can now keep, long after I turn in the waistcoat, that will remind me of how I made this pocket.

Sunday, April 3, 2011

Jigger Fix


If at first you don't succeed try try again! I think this is a good example of how being honest and consistent self evaluation can help a project stay on track. The first pair of jiggers (or back lacing detail) is my first attempt and has many things wrong with it. The corners are not turned out well and the eye-lits sit too close to the edge. The bottom second set of jiggers is my brave second attempt and a much better more precise out-come. With any project, but especially this one, it is important to re-do anything that you don't feel is up to the expected standards. I am learning that looking at the garment I am making objectively is helping me complete it to a higher standard and preventing me from rushing through even the small details.

Waistcoat Progress


This is the very beginning of my waistcoat and sort of reflection for the beginning of this garment. The process for this waistcoat seems to be somewhere between making a tailored waistcoat and more costume sewing. The main differences being the amount of seam allowance (on a tailored waistcoat has very little on this it is more to allow for any alterations), the pockets ( welted pockets for tailoring and a simpler cash pocket with flap for this waistcoat), and the back detail (on the tailored waistcoat it was a strap with a buckle on ours it is an eye-litted jigger). But one of the most useful techniques from tailoring is the precise and careful assembly of each piece, which I am trying to carry-over into this waistcoat. And that includes securing slip stitching threads and lightly pulling stab stitching threads, something carried over from the breeches. So far I have completed the pockets on the front as well as the facing and putting in cotton tape around the arm-hole. The cotton tape, something not used in tailoring, is to prevent too much stretching in the armhole. Something that will be key in prolonging the life of this theatrical waistcoat, but something I hadn't considered doing before. It is useful in a waistcoat because it has no sleeves (which would otherwise prevent it from stretching) so it is a process that could be carried over into any garment made without sleeves that runs the risk of stretching. Like I found tailoring earlier in the year I don't think the processes for the waistcoat are radical or hard to understand but they must be done with precision and focus in order to look well made and correct. Things like the cotton tape, canvas, and stayflex (around the pocket mouth) will ensure that this waistcoat stay shapely throughout many a production.

Breeches Reflection and Tutorial

Breeches Complete aside from Buttons
Breeches Full Front without Buttons
Breeches Full Front Open without Buttons
Mini Evaluation 
In sticking to my goals set in my calender I (mostly) completed the breeches on Thursday March 24th. The button holes, buttons, hanging loops, and name tag are what is left to complete on the breeches before turning them over to the National Theatre Hire Department. I am very pleased with how the breeches turned out. Initially I thought that making these would be an identical process to how we made our breeches for Candide (see first Costume post) with the only difference being the pockets. However this was a very different process; we were given the patterns instead of drafting them and did not cut a calico layer first for the first fitting and then line the breeches with the calico. Although the core techniques were similar it took an adjustment to a process I thought I already knew about. Probably the biggest challenge in putting the breeches together was putting in the cash pocket hidden along the waist-band. Unlike the welted pocket it actually affected the way the garment was put together (at least on that side) making sure the pocket bag was sewn to the leg of the trousers and then working it into the waist-band. [The welted pocket was completed on the waistband before the waistband was attached to anything. I wouldn't consider it a simpler process but it was a bit more straight forward.] However I am proud of each pocket and how they work with the rest of the garment. The example pair of breeches the National Theatre Hire Department sent were very useful in finishing the breeches to a high standard. They were able to give us the amount of seam allowance left in the leg seams and what was over-locked or hand-sewn, ect. I really think that having made a pair of breeches before was really important in helping me complete this pair. Since there were no written instructions to accompany the patterns a combination of previous study, tutor assistance, and an example pair helped me complete these breeches to a high standard.
Tutorial
I had a tutorial with my tutor (Dexter) on my breeches this past week. They are to a good standard and made well, which was incredibly rewarding to hear. But I do have a few things I could adjust and few techniques to perfect. Making sure my hand stitching is really secure is very important. I think in some areas I was afraid of pulling the thread too tight and pulling the fabric. In areas where it is stab stitched (cash pocket, full front flap, ect) the thread shouldn't be pulled really at all. However where slip stitching is used to secure something ( like the arrows on the full front) the thread needs to be pulled tightly so it is actually secure. Recognizing the different needs for different stitches is important and something I am putting into practice for the waistcoat. The welt on the welted pocket on the waistband is gapping just a little. In order to fix this I should have tacked the welt loosely before slip stitching the sides to the waistband. I also had some issues with the knee-bands at the bottom. The knee-band and the over-hang for the button are not the same width. To correct this I will sew my button on so the smaller width sits more in the middle of the knee-band instead of aligning one side and making the inaccuracy more noticeable. In the future I need to be more careful and precise when bagging out the knee-band before sewing it onto the knee of the breeches. Even with a few changes and things to fix I was really happy with my tutorial and I feel like the breeches are a great success and good first garment for this unit. 

Tuesday, March 29, 2011

Reflection on Time Management So Far

So far I am happy with my time management and scheduling. It's nice to have a calendar that plans for the long run and the goals I had set for starting and completing each garment haven't changed too much. But now I am planning more directly each day and each week. Having started with the breeches I knew I had a day to cut out, a morning to mark tack, a day for the full front, ect. When the welted pocket took me longer than I anticipated I made sure to compensate that time later in the week by staying for late night study. I finished my breeches on Thursday March 24 (technically a day early but Friday was spent on a class trip so more or less on time)! It is a matter of pacing myself, and not rushing, but staying focused and committed. Today I cut out my waistcoat and plan on really working this week to get most of it done. Although I had set the time for the waistcoat to be finished as after the holiday I have set myself the new goal of finishing it before the holiday. I feel like the work would be more consistent without a long break in the middle and it would be better to come back from the holiday and start something fresh and new.

Friday, March 25, 2011

Shirt

Shirt Front. Victoria and Albert Museum. Museum Number: T.104-1934
Shirt Back. Victoria and Albert Museum. Museum Number: T.104-1934


Night Shirt. Victoria and Albert Museum. Museum Number: T.594-1999

Waugh, N. (1964). The Cut of Men's Clothes 1600-1900.
London, Theatre Arts Book. 
These are some research images I found for my shirt. It has been difficult to find a shirt that is exactly like the one I am making, however several come close. The shirt I am making doesn't have a neck ruffle like the first image, but it is very similar in other ways like the cuffs, sleeves, and back. I also thought this image of a night shirt was good because the button stand looks similar to the one I am making, as well as the sleeves and cuffs however, obviously, not the length. Lastly this pattern is somewhat close to my shirt as well. There is a gusset both under the arms and at the the neck in this pattern and in my shirt. And where the ruffles might be on this pattern is where the simple button stand will be on mine. However one thing I haven't been able to find in my research is a similar collar to the one I am making. It is an odd shape and not just simply flat and folded over like the images above. In terms of putting my shirt in an era, I think that would be a very complicated thing to do. In the first image the shirt is from 1846, the night-shirt is from 1874, and the pattern is from 1720. So this shirt has the potential to have a wide scope in terms of it's place on a timeline. I think that is a very smart thing for the National Theatre Hire Department. The style of men's shirts, from what I have learned, doesn't go drastically from one era to the next. It has a kind of gradual development, so having a shirt that could cover quite a few years would be a smart addition to a hire department.