Tuesday, January 17, 2012

EMP Project Proposal


 For my EMP I am choosing to do my own project. I would like to make two costumes based on Sarah Gibb’s illustrations in the children’s book The Princess Who Had No Kingdom.  The illustrations are creative and distinctive; they give a suggestion of cut, texture, and pattern without being definitive. I will be creating the two different styles of the Princess, the colour and the black and white ;by creating an interpretation of these ‘designs’ I will be pushing my creative and interpretive skills to a new level.  I will also be able to experiment with a lot of different techniques such as laser cutting, applique, embroidery, dying, and possibly lace making. To accompany these costumes and my portfolio I will be making historical undergarments to go under each costume to create more of silhouette. This project will push me technically and creatively. The historical undergarments will give me a chance to improve my patterning and sewing ability to a high level. Creating the costumes over the historical garments will give an opportunity to explore draping, something I have not yet done, and then transfer that to a paper pattern and garment. Interpreting the design will increase my understanding and skill in surface decoration and various techniques. Using an illustration as a design is also a good experience in interpreting a design, taking into account its contextual base and its functionality. It will be a valuable experience as a freelance maker in getting a design, creating the vision without having a designer available every step of the way. I feel that this is a challenging and adventurous project that will increase my technical abilities and challenge my interpretive skills.


All Images From:  Gibb, S. and Jones, U. (2009). The Princess Who Had No Kingdom. London: Orchard Books.

Story Summary and Anaylsis

 When considering and develop the context of my costumes it is important to look at the story for contextual clues and important events that may shape the characters. Although this is a sweet children's book it can be looked at from a plot point of view, as if this was a film or a play. And although I am developing my own context for the costumes there is much information I can take from the story text.

Here is My Summary of the Book:

It begins with the Princess Who Has No Kingdom. She does have a pony called Pretty and a cart. She is constantly looking for her Kingdom and makes money by carting around over-size parcels. She uses the public library and accidentally leaves her beautiful red umbrella there. She often visits the kingdom's she passes through out of politeness but she is not greeted warmly. They feed her on their second best china, give her hand-me-downs, and hide their sons. But she doesn't want for fancy dresses. She sells what she is given for money except for the thoughtful red tights a jester gives her and she wears them instead of selling them. She attends a crowning for a new King, although she is not warmly received. But at the party is enchanting on the dance floor and soon Princes and Kings are falling over themselves to win her favour. It all culminates in a food fight which the Princess finds wasteful and leaves. Comes across a young man and helps him with his stuck cart only to find he is the jester that gave her the red tights. He says his heart is her kingdom and they marry. He tells jokes and she carries parcels. She still yearns for her still lost Kingdom. Her lost umbrella turns up and is addressed to the "Princess of Here There and Everywhere!". Her kingdom is everywhere and the Princess is a Queen. Her and her King continue to explore their Kingdom of here there and everywhere.

Analysis:

Along with being an uplifting tale I find this story to have a positive message and a well moving plot. The Princess doesn't quite know where she fits in the world, she sees how others live and is not impressed. She falls in love and finds that her kingdom is the world around her and what she makes of it; that royalty is in the eye of the beholder. There is also a lot that happens in the story; there is travelling, court visits, trip to the library, a coronation, subsequent ball, inevitable food fight, romantic encounter, marriage, and ends with more travelling. I wouldn't call this an epic adventure but as a story maybe as a film it would be able to move kind of quickly if developed. This story does follow the Princess Who Had No Kingdom very closely and this obviously her journey. Contextually she is an interesting well rounded character. She is somewhat mysterious: What happened to her parents, presumably a king and queen? Where else has she looked for her Kingdom? How did she get the pony and the cart? Although the story does not answer all these questions you can imagine that she is eclectic, a collection of everything she has seen and maybe a little from her kingdom. She is most certainly a Princess though, because she 'looks like a Princess'. So already as a designer I have to decide what represents a princess: colour? texture? pattern?. She also has good manners and is kind; she doesn't rise to the slights of those who have a kingdom. So there she shows strength of character and in a small way bravery. But always she is missing her kingdom; it is what drives her journey. With her attendance to the coronation and ball she is graceful so enchanting that wealthy kings will fight her but she ignores them to look for what makes her happy. She finds love with a man who was kind to her in the beginning of the story and who has no kingdom to offer only love. So this shows her good judgement in a way. And in the end she completes her journey of self-discovery and creates her own happiness. I think that as I develop my sketches and ideas I can think about her journey and her actions and reactions. This will help me create a more solid context for the costumes and also allow me to decide how I want to differentiate the costumes based on her attributes as a character .
Gibb, S. and Jones, U. (2009). The Princess Who Had No Kingdom. London: Orchard Books.


First Tutorial

I had my first tutorial today for my Extended Major Project. I had my book with the illustrations with me and a lot of ideas, however that was it. It wasn't the smoothest meeting. I think I really need to define my idea; investigating more of the context and really developing what I am trying to say.  From the tutorial I came away with these notes:
*Create essentially the same corset
*maybe a more standard corset made of just cotton drill
* Do one corset fancy and one plain
* Two different under-structures in terms of technique
*Same style on top
*Maintain a sense of lightness
*Show as wide a range as possible
* Not much that is man-made, create as much as possible.

Evaluation:
In terms of a first meeting about my project it wasn't the most positive. I think a lot of this stems from me being slightly unprepared. I think I've got a million ideas but I should have done some sketching or maybe lists or something to better prepare myself for questions. The main thing my tutor kept stressing was "How are the two dresses going to be different? Because it seems like essentially I am making the same dress." I can understand how it seems like that from just learning about the project without sketches or anything. In my head they are very different, they are a slightly different characters and even dresses for a different occasions and both are essential to telling the story that is in the book. I also think I want to explore the idea of making slightly different undergarments for each and creating maybe different silhouettes. For the last few projects I've been given a design and done research and development but not to this extent. Before discussing my project again with my tutor I will need to do more research and development to better explain my ideas and really decide what I want my work to say.


Wednesday, December 7, 2011

Final Evaluation

            In completing the Soldier’s costume and the Narrator’s waistcoat for The Soldier’s Tale I have learned about the importance of context for making the costume, improved my technical skills in sewing and pattern making, and experienced working on a live show. One of the most important things I have learned on this project is the importance of context to the costume. This project was unlike any I had done at the AUCB so far. My costume design was unique to a specific character which meant I had to really focus on the story and the characters role within it so the costume would be successful. Looking through the designer’s sketchbook was very helpful, as was looking at pictures from the time. Images from WW1 are particularly powerful because they show the suffering and struggle for the soldiers and they helped me better understand what Stravinsky was influenced by when he was writing the show. I do wish I would have pushed myself more to look and read the script or find a recording to listen to; that is something I will keep in mind for the next live show I work on. The other import thing I learned about context is that it isn’t defined just to book and image research. In order to better understand breaking down I had a friend wear my costume and run through the woods. This was helpful for me to see where on the costume got the most wear and dirt. We also tried to do things that a travelling soldier might do, like crawl or sit in the grass. All of these activities helped me understand, possibly, what my character was going through the kind of stress his clothing would be under in day to day life and that was extremely important contextual research.
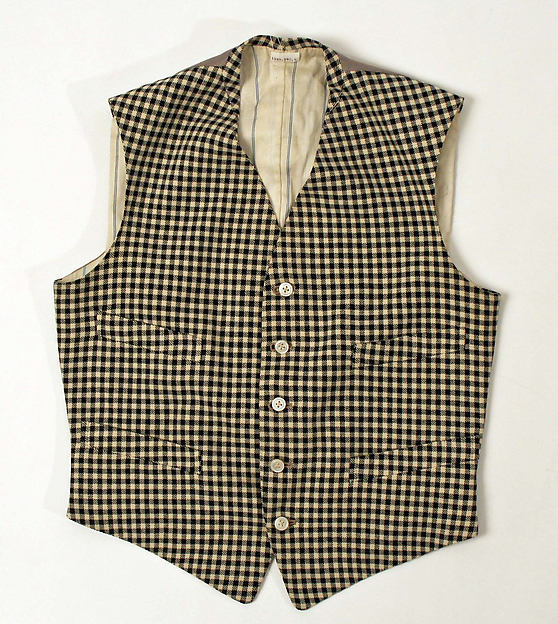
            Improving my technical skills has also been a huge part of the project. I did a great deal more of pattern making in this unit than the previous one and that gave me the chance to improve those skills. I was able to challenge myself with using historical patterns and research, something I have never done; and then to also return after fittings and make changes and alterations. Creating the pattern for the trousers was a particularly successful venture that started with a tailored trouser pattern but first hand research at History in the Making led me to use a historical pattern and free hand my own design line changes. Once I gained the knowledge from History in the Making and historical research I was able to discuss with the designer and include contextual design changes that better fit the character. This project has also taught me to cope with many alterations after fittings. In my last unit I made costumes that were not for a specific person but for a hire house, working on this project I had to both technically and aesthetically complete the design. Having fittings with the designer, director, actor, and tutors was at points an overwhelming experience, but having my finished project I can see that the criticism was constructive in completing the design. This is clearly evident in the journey the soldier’s shirt took. The toile shirt and the shirt at the first fitting were just shirts; they didn’t quite fulfill the design although they were technically correct. The changes after the first fitting were intimidating but at the end of the project working out the alterations to complete a shirt that was a design feature and not just a shirt was extremely rewarding and instructive. The waistcoat contained many technical challenges due to the pattern and weight of the wool. It held less of a challenge contextually but out of all the garments it was the most technically challenging despite the fact that I’ve made a checked tailored waistcoat before. It gave me a lot more confidence in my tailoring abilities.
            Working on a live project has been an important aspect to this unit and really given me a look at how working in the industry might be. I really enjoyed working with the designer Rose, I feel she had the right amount of diplomacy. I felt comfortable coming to her with questions and felt equally as comfortable coming to her with research and ideas. I felt I had support from the team I was working with although I still maintained my independence which I greatly appreciated. I also enjoyed my opportunities to work with Kokoro throughout the project. Being able to say I’ve worked with the Bournemouth Symphony Orchestra is an impressive addition to my portfolio and a great life experience. I have tried to work professionally whenever I have been helping with any aspect of this project, be it course members or outside contributors. I also think maintaining my blog has contributed to this live project. Being a maker doesn’t always mean I will be a dresser and interact with the performers, but having a blog kept me connected with the industry. It also gave me a chance to create an individual way of presenting my work that I can carry on with after I graduate.
I am extremely proud of all I have accomplished in this unit.

Bibliography


Specialist Practice Bibliography

318th Infantry Regiment 80th Division, AEF (n.d.). Putting on Puttees. [Online] Available from: http://www.hardscrabblefarm.com/80th/putting_on_puttees.htm.  [Accessed 4 December 2011]

Cariou, G. Shep, R.L. (1999). Shirts and Men’s Haberdashery: 1840-1920’s. California: R.L.        Shep Productions.

Carmen. W.Y. (1957). British Military Uniforms from Contemporary Pictures, Henry VII to the     Present Day. London: Leonard Hill Limited.

Covey, L., Ingham, R. (1992) The Costume Technician’s Handbook. New Hampshire: Heinemann  Education Books Inc.

Good-Music-Guide (n.d.). Igor Stravinsky- The Soldier’s Tale. [online]. Available from:    www.good-music-guide.com/reviews/081_soldiers_tale.htm.

History in the Making. (2011). Historical Reconstruction Specialists. Research re-created WW1    trousers. 13th October.

Howard, P. (2011). Costume with Performance Design. Arts Institute at Bournemouth. 1 November.

Jno. J. Mitchell Co. (1990). Men’s Fashion Illustrations from the Turn of the Century.         London: Dover Publications Inc.

Leggings and Puttees. (n.d.). [Online]. Available from: http://www.aef-doughboys.com/leggings.html. [Accessed 4 December 2011].

Liddle, P. (1979). Testimony of War 1914-1918. Great Britain: Butler and Tanner Ltd.

Masters, J. (1965). Fourteen Eighteen. London: Michael Joseph Ltd.

Oliver, J. (e.d.). (1995). Everyday Fashions 1909-1920 As Pictured in Sears Catalog. New York: Dover Publications

Shep, R.L. (1998). The Great War: Styles and Patterns of the 1910’s. California: R.L. Shep Productions.

Wombell, P (1981). Battle Passchendaele 1917: Evidence of War’s Reality. London: Travelling Light Photography Ltd.


Image References:

318th Infantry Regiment 80th Division, AEF (n.d.). Putting on Puttees. [Online Image] Available from: http://www.hardscrabblefarm.com/80th/putting_on_puttees.htm.  [Accessed 4 December 2011]

Front Cover of Histoire Du Soldat. (n.d.) [Online image]. Available from:
[Accessed 18 October, 2011].

Imperial War Museum. Puttees (long), O/Rs. (n.d.). [Online Image]. Available from: http://www.iwm.org.uk/collections/item/object/30100757. [Accessed 23 November 2011] Catalogue Number: UNI 12827.

Imperial War Museum. Puttees, Khaki, Other Ranks (British). (n.d.). [Online Image]. Available from: http://www.iwm.org.uk/collections/item/object/30100384. [Accessed 23 November 2011] Catalogue Number: UNI 12583.

Imperial War Museum. Puttees: M1912, Dutch O/Rs. (1912). [Online Image]. Available from: http://www.iwm.org.uk/collections/item/object/30100780. [Accessed 23 November 2011]  Catalogue Number: UNI 12853.

Leggings and Puttees. (n.d.). [Online Image]. Available from: http://www.aef-doughboys.com/uniformphotos/Puttees.jpg. [Accessed 4 December 2011].

Leggings and Puttees. (n.d.). [Online Image]. Available from: http://www.aef-doughboys.com/uniformphotos/Woolwraps.jpg. [Accessed 4 December 2011].

M.J. & Co. , Checked Waistcoat. (1910). [Online image]. Available from:
[Accessed 10 October, 2011].

National Library of Scotland. Soldier’s Comrades Watching  Him As He Sleeps. (n.d.). [Online Image]. Available from:


Poole Lighthouse Theatre. (n.d.). [Online Image]. Available from: http://www.tourismleafletsonline.com/theatres/Poole-Lighthouse-Theatre.jpg. [Accessed 15 October 2011].

Still from ‘My Boy Jack’. (n.d.). [Online Image]. Available from: http://images.movieplayer.it/2009/07/29/daniel-radcliffe-con-altri-soldati-in-una-scena-nel-film-my-boy-jack-125718.jpg. [Accessed 27 November 2011].

                                            
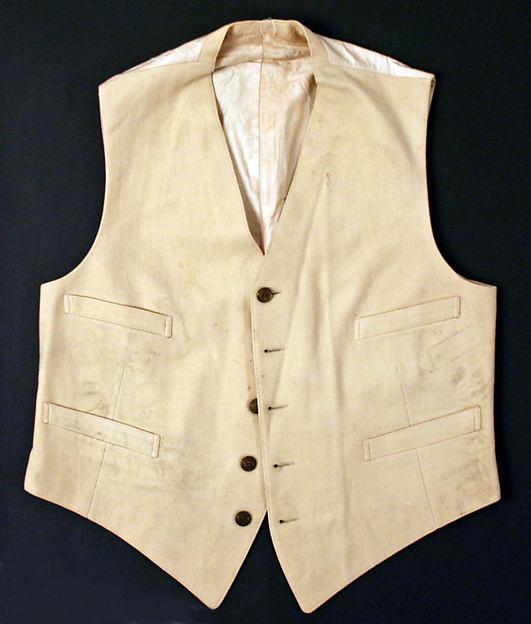
Whitaker & Co. Inc. Cream Waistcoat. (1916). [Online image]. Available from:
[Accessed 10 October, 2011].

Breaking Down: Part 3

At my dress parade I was asked to break down the trousers more than they already were. It was suggested that I press and steam them to kind of stretch them out, possibly sand them to make them look worn out in places, and to spray into them a little more. To stretch them out with steam I put the trousers on a form with legs and wrapped them with the putties like I would have on my actor. And in my fitting I had marked with safety pins exactly where Josh's knees were so I could get the right area to focus on. My process for the steam was to spay a light mist of water and then blast with steam and then too pull and scrunch the fabric while it was still warm and damp. I do think this loosened up the fibers and stretched out the trousers more, especially around the knee. Next was to use sand paper to roughen up the edges and places that would be worn down. I was really skeptical of doing this because with the cheese grater it kind of just pulled out fluff without creating a visual affect. The sand paper did work better with enough concentration. The main areas that were sand-papered were the knees, bum, pockets, waist line, and button stand. Hopefully this roughing up will be easily seen from the audience.
Back After steaming and sanding 

Front After steaming and sanding
Close up of back after sanding
My next step after this was to just go back in with a little dye and darken up the knees. My tutor suggested that I put the trousers on legs, and then wrap the putties and just spray where they fall and don't flatten out creases; just to let them hang as they would one a body.

Knees after being sprayed into

Trousers after being sprayed into
Evaluation: Working on the breaking down one more time before they go on stage was a good thing. After seeing the trousers under the lights and on my actor I could see where they needed a little more attention. When I sprayed into them this last time I put more dye than water into the air-brush, unlike when I had previously sprayed and filled the jar equally with dye and water. I think that if I had been a bit bolder and used stronger dyes they would have broken down more before the dress parade. I now know that for stage lights going a little extra in the breaking down than you normally would will probably look just about right.

Monday, December 5, 2011

Dress Parade

Today was the dress parade for The Soldier's Tale. A dress parade is something that, I feel, is particular to a live show. It is where the makers, actors, make-up team, designer, director, supervisor, tutors and crew get together to bring the costumes together. It was extremely rewarding to have all four makers there and to see all the actors dressed in full make-up all at the same time. On all the other project I've worked on here there is a second fitting and then the costumes are put on forms for hand in and then worn in the performance. This was a great time to see everything come together, everyone's work to be seen, and for sneak peek into what the final show (or at least the costumes) will look like. This was also an opportunity for there to be any last minute changes or alterations.

The Soldier:
First to be dressed was Josh who plays the Soldier.

Back View

Front View

Wrapping the Puttees

Soldier with Jacket On

Soldier Without Jacket, but Hat On

Close up of Puttees
Evaluation: This was the first time I have seen the costume all put together and being worn by the actor it was made for. I am extremely proud of what I have made. I was apprehensive at the start of this project but I am happy to see it come together. Josh seemed very comfortable when he put his costume on and as the parade continued he did some movements and danced a little and he said it was comfortable for that. I was happy with the proportion of the trousers to the shirt and how the puttees created a little volume around the knee. For the puttees Josh was given long socks to wear. Initially when he got dressed they tucked the bottom of the trousers into the socks and then we tried wrapping the puttees around that. However that seemed to make the putties look bulky and not tightly wrapped (see Close up of puttee, left leg is the one that is tucked into the sock, the other is with the sock underneath.) The better solution was to put the sock under the trousers and wrap the putties around the trouser leg. I think it was a good thing to try it both ways, especially with the designer and supervisors there. If this was a travelling show, as a maker I would want to work with the supervisor before sending the costume off to figure out things like this. I do wish his shoes had come so I could see how the puttees worked with the shoes, but I am going to try and go to the tech rehearsals to see how the costume works during the performance. I think one of the things I was most surprised about was how much the shirt and it's alterations changed the look of the whole costume. I think it really pulls it together and completes Rose's design. The smaller collar no longer swallows his neck and still looks like the casual simple shirt I was aiming to create. The washing and breaking down I did makes it look soft and lived in. Re-working the shirt was a good experience that taught me to constantly reference the design, pay close attention to proportion, and never to be intimidated by big changes. I am going to wash the shirt again before I turn it in just to break it down a little bit more, but as Josh wears it for rehearsals and performances and it is then washed again and again I think it will continue to look lived in. I am also very pleased with my trousers. I think they fulfill the historical and character aspect of the design. Rose was particularly happy with the trousers and how they looked. The director and my tutors did suggest breaking it down more. Using the iron to really press it and wear the fabric down as well as maybe adding more dye. Seeing it under the stage lights some of the breaking down and dye doesn't really show and I agree that it could use some more distressing. The coat and hat were sourced from the National Theatre Hire House and really complete the look of a soldier and are a good match to the fabric used on the trousers. There are just minor changes with the Soldier's costume. The director and designer are pleased with how it all looks and so am I.

The Narrator: 
I also had my waistcoat to show in this parade and it is worn by John.
Waistcoat Front

Waistcoat Back

Waistcoat with Hat and Jacket
Evaluation: Just like the Soldier's costume I am extremely proud of how the waistcoat looks and fits. The lengthening of the straps in the back really make it fit well without pulling too much. And with the buttons on the stripes match up perfectly on the front. I found tailoring this waistcoat to be very challenging for many different reasons like the checked pattern and weight of the fabric. Overcoming these challenges makes the finished product even more rewarding. I wouldn't say I learned many new processes making this waistcoat but I have certainly improved my specialist skills. If asked in an interview or on the job if I could tailor a waistcoat I can say with confidence that I have after completing my second checked waistcoat for this project. My only adjustment is to just give it a very good press and it will be ready for the show!