Friday, October 7, 2011

Learning Agreement and Time Plan

This is the description of my project from my learning agreement. It contains details on what the project is and how I aim to complete it.


Learning Agreement Proposal:
For my Specialist Practice project I will be making a tailored pair of WWI trousers including putties and an early 20th century shirt for the costume of Soldier in A Soldier’s Tale; a BSO/AUCB production performed at the Pavilion Ocean Room. All the pieces will be broken down according to the design. I will also be making a tailored waistcoat to accompany the three piece suit for the character of Narrator in the same production. I will be challenging myself by taking on a large tailoring project, including trousers which I have never made before, enhancing and developing those skills learned in the Level 5 tailoring unit. I will be developing and improving my pattern drafting skills, an area that I also haven’t had extensive experience in.
 By making a detailed work plan I will keep myself on track to meet all fitting dates and other production deadlines. I will use the library to research the era and production and look to outside sources when available to increase my historical and contextual understanding of my costume and the production. Whilst working on the project I will first challenge myself to investigate any problems independently using my research and independent judgement learned in previous units, before asking for tutor assistance. I will also work to develop my professional skills by communicating with the designer, supervisor, tutors, actors, and outside collaborators by asking questions thoughtfully and timely so that the creative and technical realisation of this project is completed; as well as working with the other making students to successfully finish all four designs as coherent representations of the designers vision. Overall this project will help me develop my sewing and pattern drafting skills to a more professional level. I will gain more experience in tailoring which will give me a wider skillset as a freelance maker. The opportunities to explore breaking down techniques and perfect my finishing skills are also valuable experiences to put on my resume.


Time Plan:
Before embarking on this project I've made a time-plan to better manage my time, set accomplish-able goals, and remember important dates and deadlines. Since this is a live project some of my personal deadlines are relative between two days and what I have written for each week is to help me stay on track. Other things like dress rehearsals, performance dates, and lectures I was able to include definitive dates and times. Here is my time plan for this project. Since this is the start of the project I'm sure things will change as the project continues.


Thursday, October 6, 2011

Buying Supplies


One of the keys of this project is working as a team for a live show. This means not only working as a making team but working with the designer and supervisor. Our production supervisor Grace sent out this message recently:

Original Message:
Hi Girls,
Hope your all well.
I haven’t yet received the budget however I want to get it clear in my head what is needed for each costume, so I can divide the budget accordingly.
Please could you all have a think about all the components of your costume, and email me everything you think you will need with an idea of how much of it as well. For example, fabric, cotton, buttons, trimmings, beading etc etc. 
This would be so helpful for me as I can then divide the budget between you all.

Thank you so much.
Look forward to hearing from you.
 Love Grace x

My Reply:
Hi Grace! Here is my list, I think this will be everything I need, but I'm also just guessing. And as for the amounts they are all kind of relative too, since I haven't made trousers or this style shirt yet.

Trousers:
Fabric: about 2.5 to 3 meters
At least two buttons for braces
canvas for at waist: not much maybe .25 meters
Closers (not entirely sure what will be used yet, snaps or hooks&eyes or a zipper so I'll get back to you on that)
Green thread 1 to 2 spools
Tailoring Basting thread: 1 spool

Putties:
1 meter of fabric maybe 1.5 to be double sure, especially if it's cheap
maybe a few snaps or hooks and eyes
a pair of socks
1 spool of thread to match socks

Shirt:
Fabric: about 2.75 to 3 meters (maybe 3 just to be sure)
8 buttons
1 to 2 spools thread to match fabric
maybe .5 meter stayflex for collar and cuffs

Waistcoat:
Fabric: 1 meter, maybe 1.5 is checked
size 3/8 buttons ( I don't have a copy of the design so I can't count them but maybe get two extra just in case one falls off or gets lost)
Silesia to match 3 meters
1 spool tailor's basting thread
1 to 2 spools thread
canvas about 1.5 meters
small amount of stayflex

Okay I hope this helps! Let me know if you think something's missing or if you need more info!
Emily Manning x

Reflection:
When I received this email initially I was anxious about writing my reply. I wasn’t sure I could accurately judge lengths needed or possibly know all the supplies. I’m sure Grace wasn’t seeing this preliminary list as all we will ever need but I wanted to make it as detailed as possible. I think this was actually a helpful opening exercise. It got me thinking about all the supplies I will need and the potential making process for each garment. In future projects where I buy the supplies it'll be important to make lists like this throughout. As a free-lance maker I may need to quote an amount for the supplies for the client and making a supplies list will be key.  As a maker I also really appreciate that our supervisor is keen on getting us all the supplies we need as soon as possible, by taking the initiative at the beginning of this project it will, hopefully, make getting the supplies smoother for both of us.

Tuesday, October 4, 2011

SP Introduction to Project


Initial Meeting with: Designer: Rosalie Tyack, Supervisor: Grace Mortlock, and fellow Makers: Anushka Tay, Beth James, and Emily Hudson.
Front Cover of Histoire Du Soldat. (n.d.) [Online image]. Available from:
[Accessed 18 October, 2011].


Our first official meeting for A Soldier’s Tale was very exciting. It was an opportunity to meet with the Designer: Rose, and the Supervisor: Grace, and my fellow makers: Anushka, Beth and Emily. We started by listening to a description and summary of the show by Rose and then a look at her costume designs, as well as, a brief explanation of the set. This was our opportunity to ask questions and to also get to know more of the show than just the costumes. We discussed dates, the interaction with the orchestra, short documentary on the making of, and the music. Mostly we discussed the costumes and Characters. Here is a small brief description for each character:
Narrator- wears a three piece suit of the era with many pockets to store props, remains the same throughout the show
Soldier- wears a men’s shirt, WWI army trouser, and changes slightly throughout the show.
Devil- wears a body suit with added hips, cape and breast plate, and has 5 to 6 costume changes (quick changes) most of those will be sourced.
Princess- a flowing dress with lots of movement based on the era but not a re-creation,           and remains the same throughout the show.
 After looking over the designs we were allocated what we were to make. I am making the soldier’s uniform (shirt, trousers, and gaiters). I will also be making the waistcoat for the Narrator. We exchanged contact information and set about doing some research.
These are the two designs by Rosalie Tyack that I will be making. I will be making all of the Soldier's costume including, trousers, shirt and putties. For the narrator I will only be making the waistcoat. For more information on Rose's designs you can follow her blog here: http://rosebudcostumeblog.blogspot.com/

Evaluation: I felt like this first meeting was very successful. I had a limited knowledge of the show and what it entailed. It gave me a better understanding of the context of the costume within the show and the importance of my character. It was also helpful to talk to my fellow makers and know what they are working on so we can stay focused as a team throughout this live project. It was a good starting point because we received the dates of the show and the hand in deadline with the design and I could already begin thinking about a timeline. Although not every specific of each costume was discussed it gave me enough information to guide my research. Rose was able to put it in the context of: WWI, soldier from the British Army, costume/uniform is very worn. I was able to do my research (the next step) looking for images/patterns that were more specific but not restricting. 


Sunday, May 15, 2011

Final Evaluation

For my Self-Directed Project I made four garments for the National Theatre Hire Department. This was a good opportunity to experience what it would be like working in a professional work room, become more confident in my sewing abilities, and to create and manage my own time plan.
                Working on a project like this was a valuable lesson in planning both long term and weekly, even daily. In the beginning I created a calendar for the length of the whole project, planning out when I would start and, hopefully, finish each project. I tried to be thoughtful when planning out the length of each garment so I wouldn’t feel rushed and I was able to stick to my time plan successfully. I finished my breeches and almost my entire waistcoat before Easter Holiday began. And although I switched the two shirts around I was able to finish two days before the original hand in. This schedule would not have been successful though if I didn’t have a weekly/daily plan as well. In general I made sure I came in for 9.30 every day that was scheduled and on days the studio was open. If I felt I was behind I tried to stay for late night study to compensate. By planning my own scheduled I learned more how to manage my time for a longer project and to stay focused every day.
                Experiencing a work room setting was a huge part of this project and an aspect I was very interested in for a potential future job. I really enjoyed the regularity of coming in every day and sewing and the community feeling of everyone working to complete a project. One of the biggest problems and adjustments was not being in charge of our own supplies. I’m used to bringing in what I will need for the day, both fabric and sewing kit. However our supervisors were in charge of all of our materials. I did think they did a good job but could have been more prepared. At the beginning when we all started working on the breeches they still didn’t have the canvas or the Silesia we needed for the pockets and waistband. This caused us to cut into fabric that was originally intended for a waistcoat and make do with a different canvas than what was ordered. Things like lining and Silesia could have been one of the first items to be ordered because they weren’t necessarily seen on the outside. However, just like in any work room, adjustments can be made and solutions were found for these problems. Another initial adjustment was figuring out the balance of how to make these garments. We had many resources to look at like: our previous class instruction, the garments provided by the National, the National patterns, and our tutor. I found it challenging at first to know what to look at when I had questions or when I wasn’t sure how something should be put together. I feel I was able to find a successful mix between all these different elements. Instead of just going head first into each garment or process taking the time to look over the example garment, write out my own instructions and then talk it over with my tutor seemed to be a very successful blend. This gave me the opportunity to figure out how I would make it on my own and then talk it over with an instructor who could give me advice, suggestions, and make sure there wasn’t anything I had left out. It taught me to look a few steps ahead but also made me feel more confident in my abilities to put a garment together independently.
                I’ve learned a lot while making these four garments and learned and perfected many processes; and that has made me a more confident maker. I feel like now I could go into a work-room on work experience or an internship or job and feel like I could make any one of these garments. For each garment there were certain challenges. For the waistcoat and the breeches it was putting in the pockets, only on type (the welted pocket) I had made before so the other two were new processes. The pin-tucks on the blouse and deciphering the pattern for the shirt were also challenging. Overall keeping the garment neat and not over-worked was one area I worked hard on but that I still could improve. Keeping the garments neat and the work space neat are important lessons learned from this project.
                I feel like I completed the goals set out in this project through keeping to my time plan, learning to work successfully in a work room, and learning new and perfecting old processes. 

Wednesday, May 11, 2011

Shirt Evaluation

Finished Shirt Front


Finished Shirt Back
I am very pleased with how my shirt turned out. I think this was good last garment to make because I did it almost entirely on my own and I was able to draw on things learned from the previous garments I made. The challenges I overcame for this shirt were figuring out a different/difficult pattern, putting in a button stand, and thinking a couple steps ahead throughout. I did have a small tutorial on the button stand with my tutor but most of the information and instruction came from looking at the example. Looking at the shirt now I think I would have made the button stand a little longer. I think maybe going in between the 8” it said on the patter and the 14” from the example would have been a good compromise between the two; and it would have allowed me to put in an extra button or two. I also am very happy with my time management on this this shirt. I started it on Monday May 9 and completed it on Wednesday May 11. That was very close to following my time plan. It was pretty much the same amount of time originally scheduled just in a different week. This will also give me an opportunity to go back and see if there is anything other garment that needs a little re-touching before hand in. I think working on this shirt was a good independent working experience. I was able to talk to my tutor when I was unsure but I also tried to work as much independently as I could. I feel like this is more like a real work room and hopefully the amount of time it took is a bit closer to what it would take in  a real work room. 

Tuesday, May 10, 2011

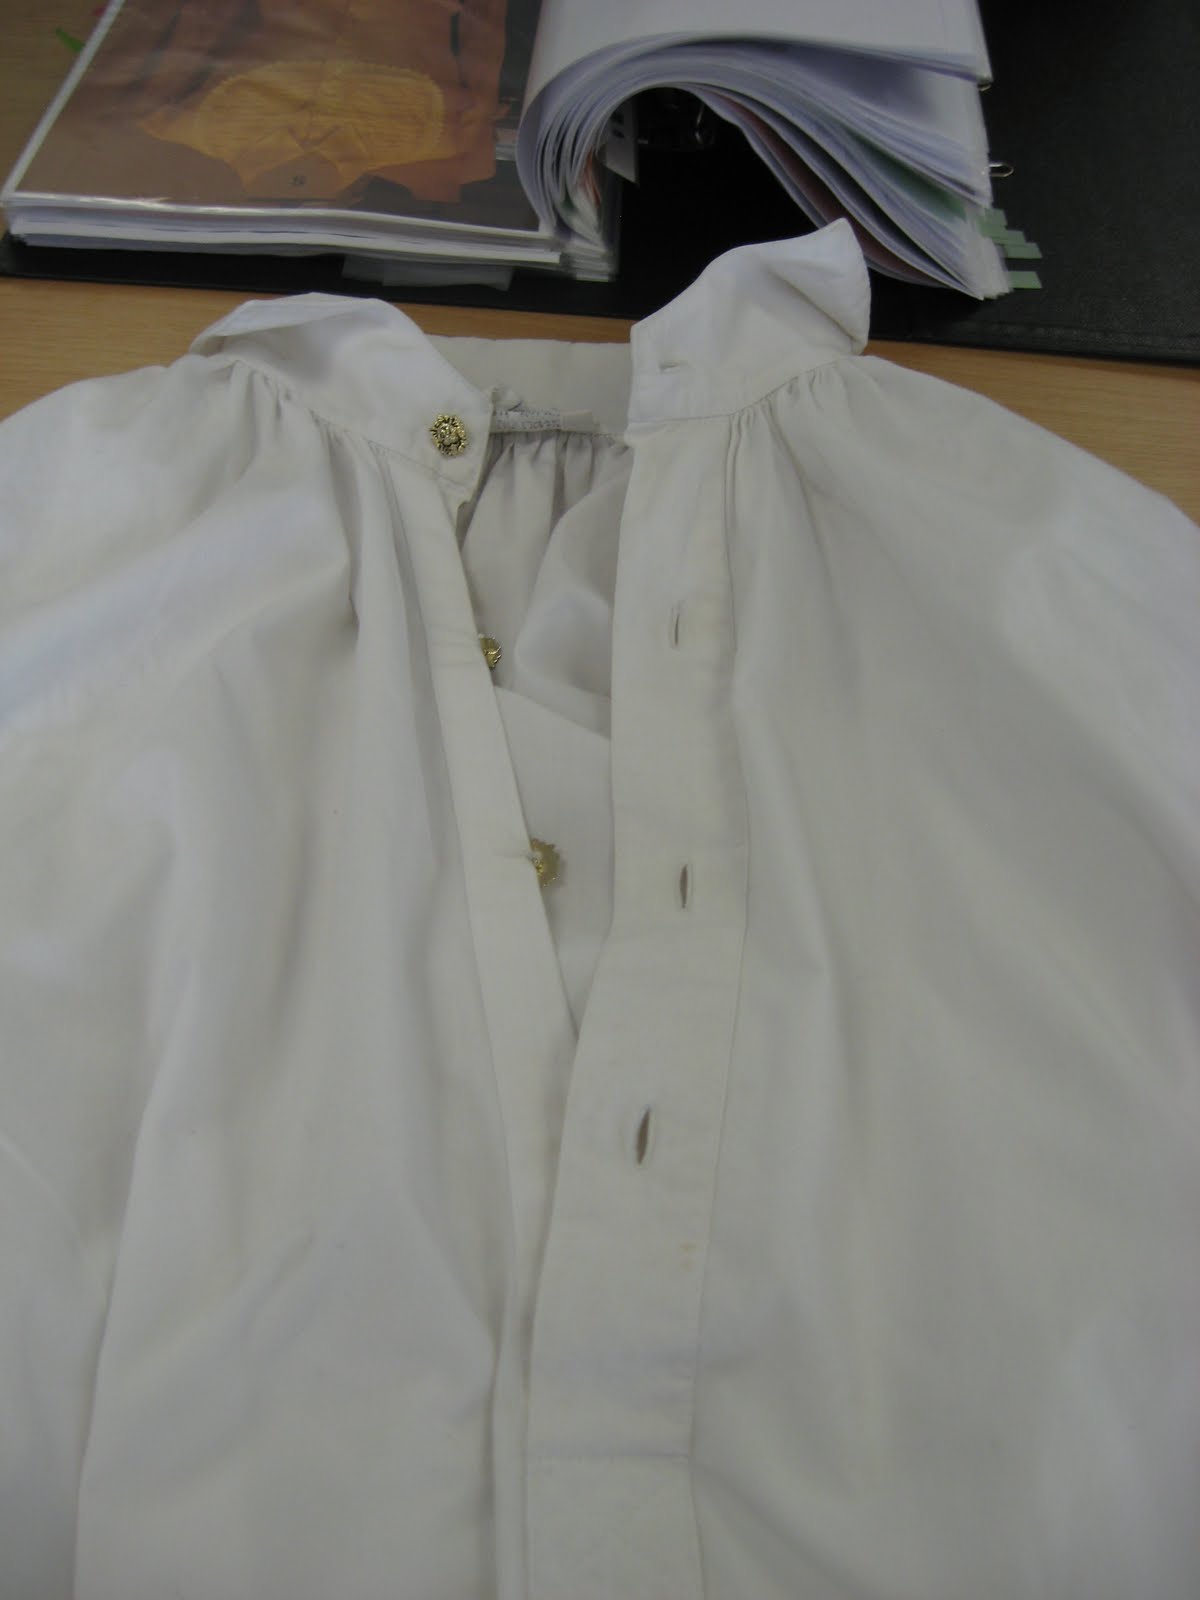
Shirt Button Stand

Original Shirt from National Theatre Hire Department


My finished Button Stand
Probably the most challenging part on this shirt so far has been putting in the button stand. It is both similar and very different to the placket we learned how to put in, in fundamental studies. It is different because it is not on a seam and therefore has no seam allowance. It is more similar to the how we made the points on the breeches or the sleeve openings on the blouse. I inspected the example for a while and decided to try a sample on my how to see if I could deduce how it was made. This was semi-success and I showed it to our tutor who said it was close but not quite. He gave me a few more instructions and I tried a second sample. This was also not perfect but I better understood how to do it and felt confident to try it on my shirt front. I am happy with how it has turned out. However I was confused about the length it should be. On the pattern/graph we were given it said the opening was 8” however I measured the example and it was 14” which is a huge difference. This is one of the challenging things about working from a pattern that is a little different from the shirt. I decided to go with 8” because the pattern is what we were mainly to be working from and I figured that perhaps the shirt was just the closest they could find to the pattern. Creating this button stand was useful because it is a similar process to things we have already made but it is a variation and it is definitely building my repertoire of different things I can do. 

Putting the Shirt Together

Putting the shirt together is a relatively speedy process once the pattern pieces are cut out. By looking at the example shirt I can gauge how to construct it fairly easily. What was helpful was taking a moment before I started sewing to make a kind of plan for myself of how to approach making the shirt. First I started by making the front and then planned on making the sleeves and then putting it all together. Taking a moment to look over the example I made plan of action I made little notes like this:
Sleeve Opening on front is 13”
So sew up the sides 13”from the top plus s/a
Do shoulder seams 2” from the neck end
Insert triangle at neck, over-locking before hand
Cut down front to put in button stand
Ect…
This made things easier when I started putting things together because I already had a thought out list to look at and I think that really helped speed up the process. Being able to plan and think ahead is really coming in useful for making this shirt. It is a good thing to have to think about. ‘Do I need to over-lock this edge before I sew it, how much seam allowance do I need, if I put this in first will it be in the way when I attach it to..?’ This shirt is becoming a good exercise in thinking ahead.