Wednesday, November 30, 2011

Initial Breaking Down: Out in the Woods

  It was suggested by my tutor that when my trousers were done and ready to be broken down to go and run around the woods and play in the mud, because real mud is better than fake mud. I was apprehensive to say the least; here was the labor of several weeks about to get mud on them. Luckily I had some help from my friend (and in my opinion someone who is particularly good at breaking down) Ellen. So here is the start of our breaking down journey in Merrick Park.
At the start of the journey when they were still new and shiny
We were lucky that it had been raining on and off for the past few days so there was mud and wet leaves and grass around that would help create the effect we were looking for. 

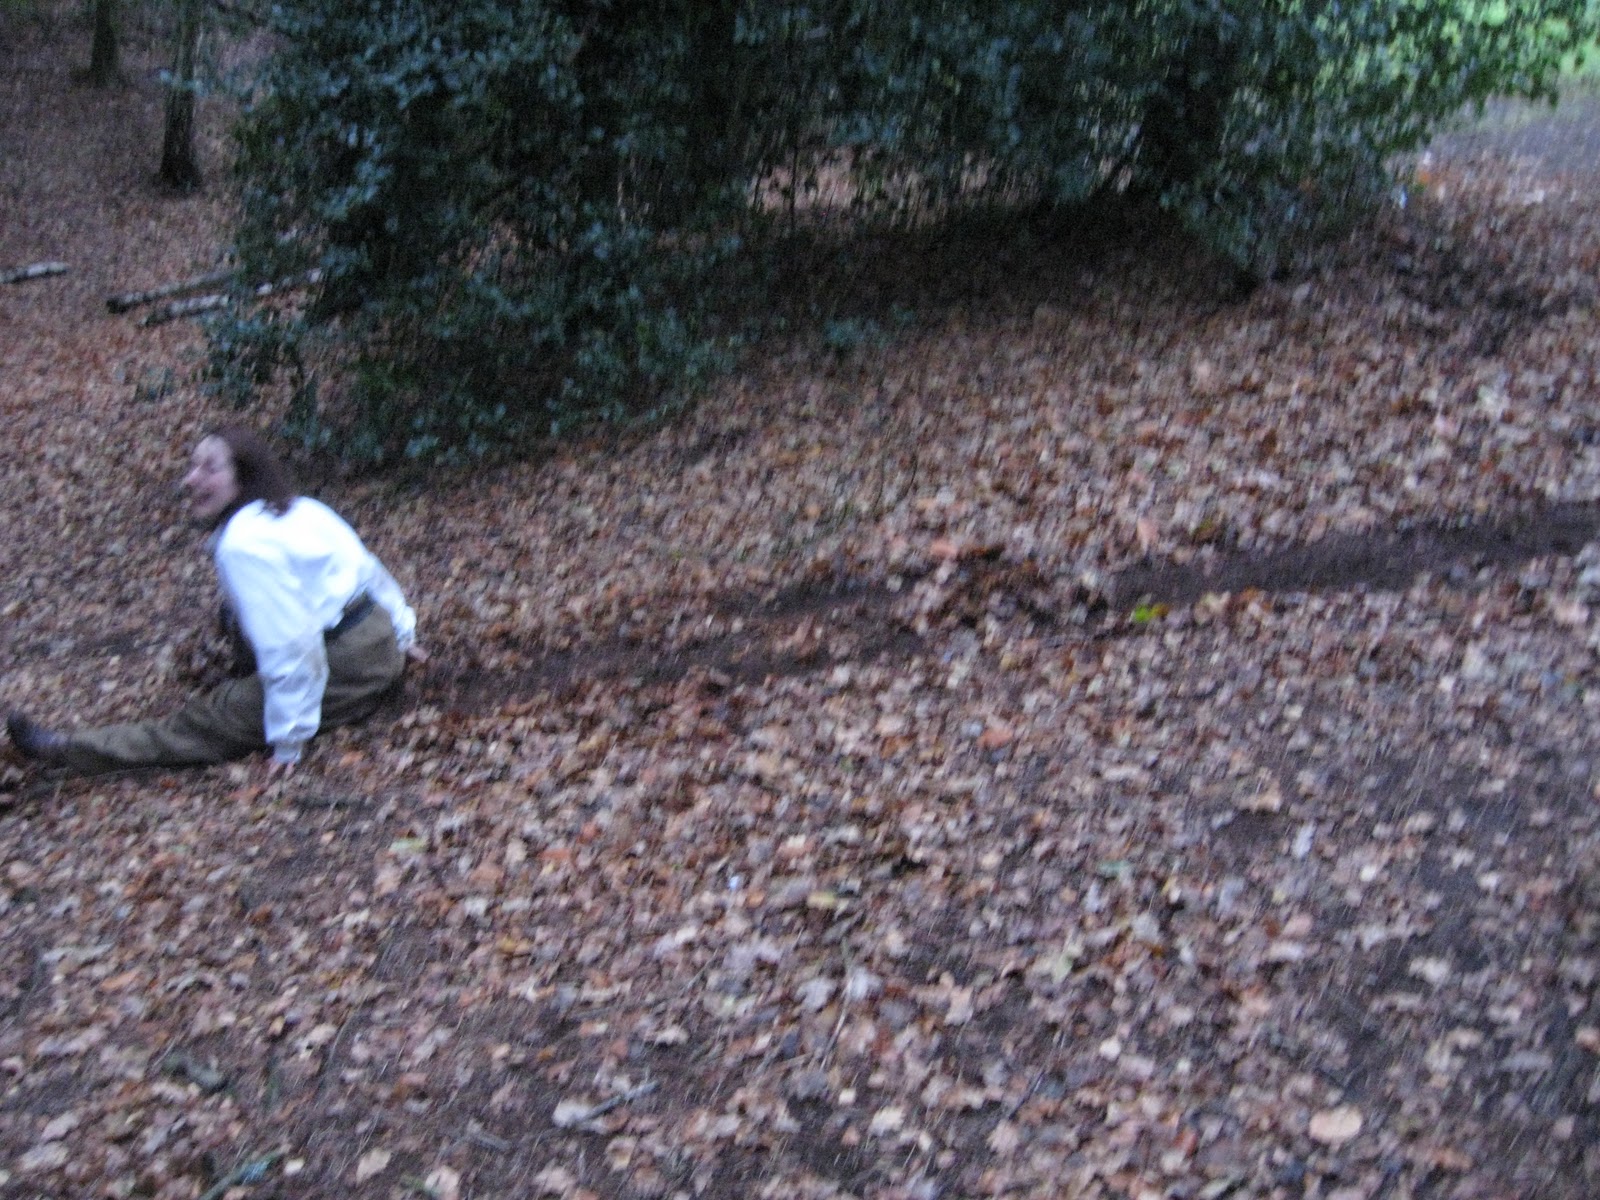
Ellen climbing up the hill through the leaves in mud, working earth into the knees. 
  On this journey we tried to think about things the character of the soldier would be doing. Him walking on his knees up-hill might not seem entirely realistic but he would have been up and down on his knees getting water or picking things up and because the knee is an area that gets used a lot it would attract things like mud and dirt. We also tried just sitting in the grass, like he would when he needed a break, or lying on his back and resting.
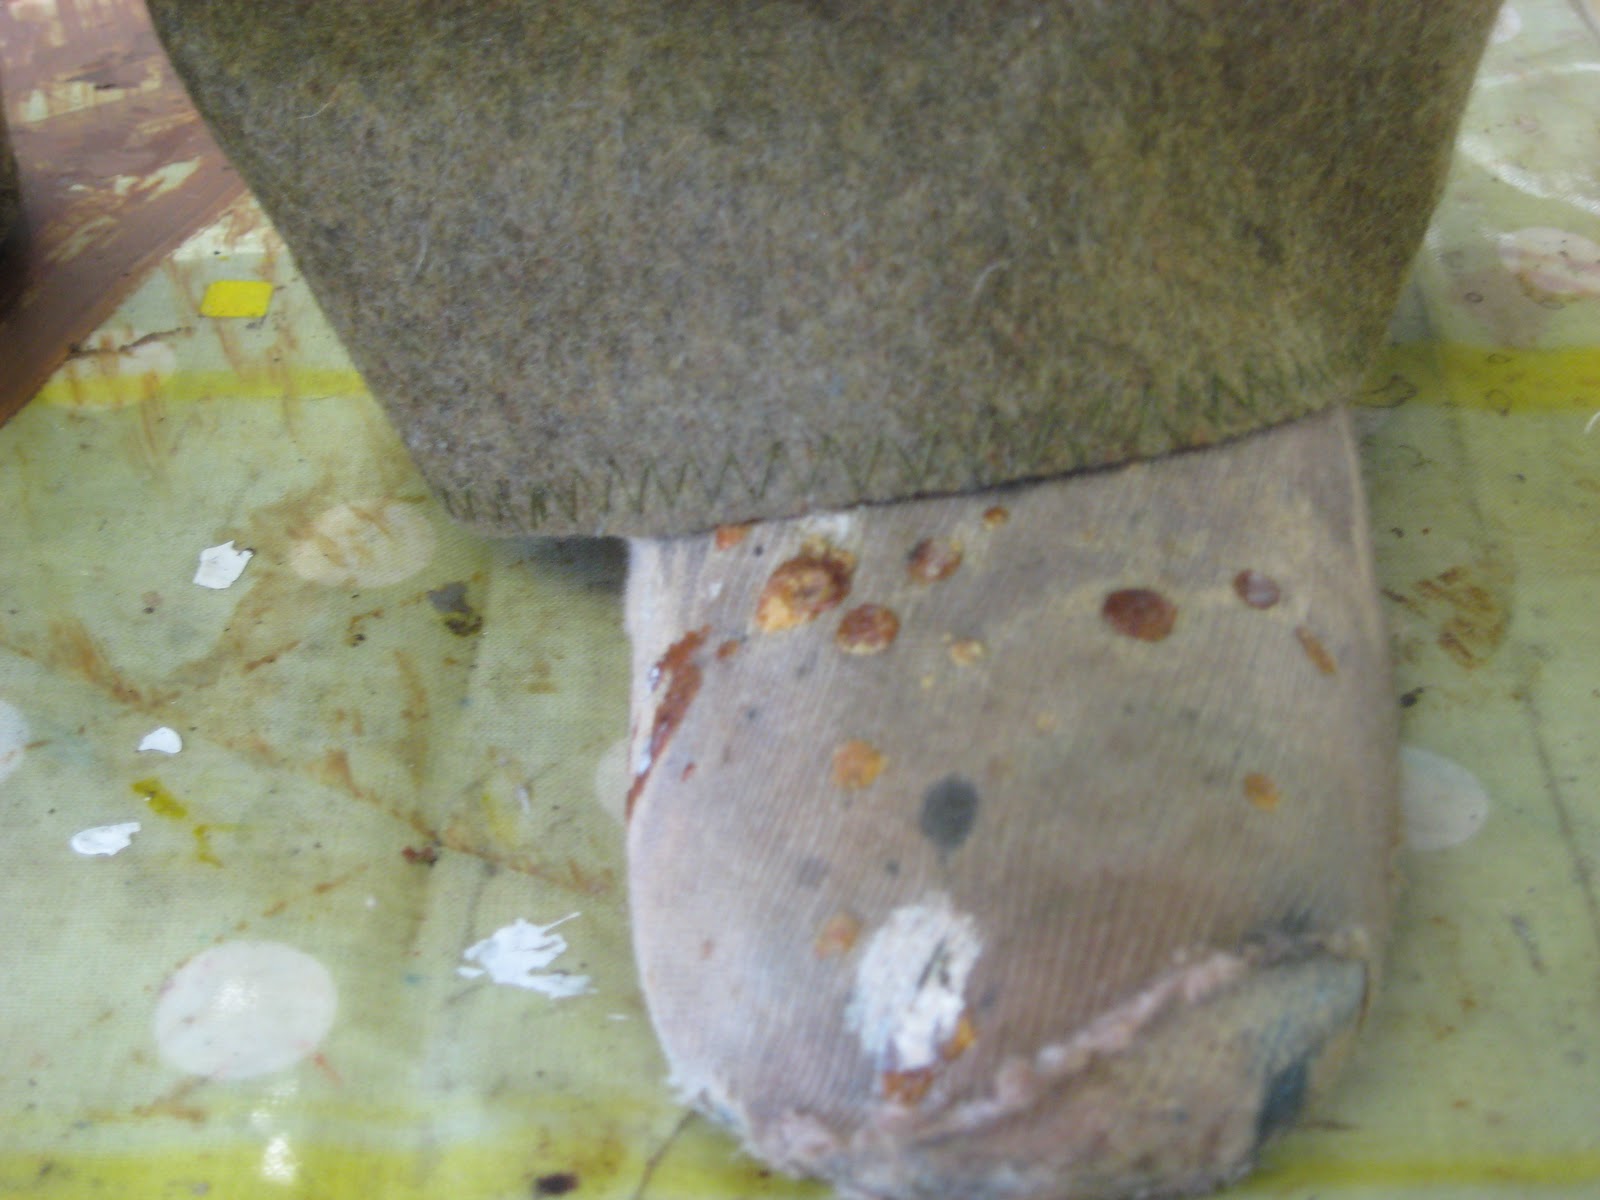
Here with the first results of our journey, the beginnings of  the dirty knees

I had brought the shirt with me but I wasn't entirely sure if I was going to have Ellen wear it or not. I think it was a good choice for her to have it on. Even though she wasn't literally rolling in it, just doing normal things I was surprised at how dirty it got.

Adding the shirt to the mix
One of the first thing Ellen did when she but the shirt on was to sit back down in the grass then prop herself up on her elbows for a little and then lay on her back. I wasn't expecting to see grass stains and dirty elbows so quickly in just one action but that's how it happened. It's easy to see how quickly the soldier could get muddy and grubby if he was wearing this shirt everyday. However I also wanted to be mindful that he would be wearing his jacket over his shirt at some points and that the shirt shouldn't get too grubby.

Relaxing but working in the stains at the same time
One of the other things Ellen and I came up with was to try and touch places that would have gotten worn by sheer use. Such as the pockets on the trousers, the fly front, the collar and buttons on the shirt, and the cuffs. Ellen would rub her hands in the mud and then wipe them on the front of the trousers just like she would if she were in the words and tripped or got her hand dirty.

Other adventures: sliding down a hill
Army crawling up hill 


We tried many different things like sliding down hill and army crawling up hill, leaning on trees, sitting on old logs, ect.
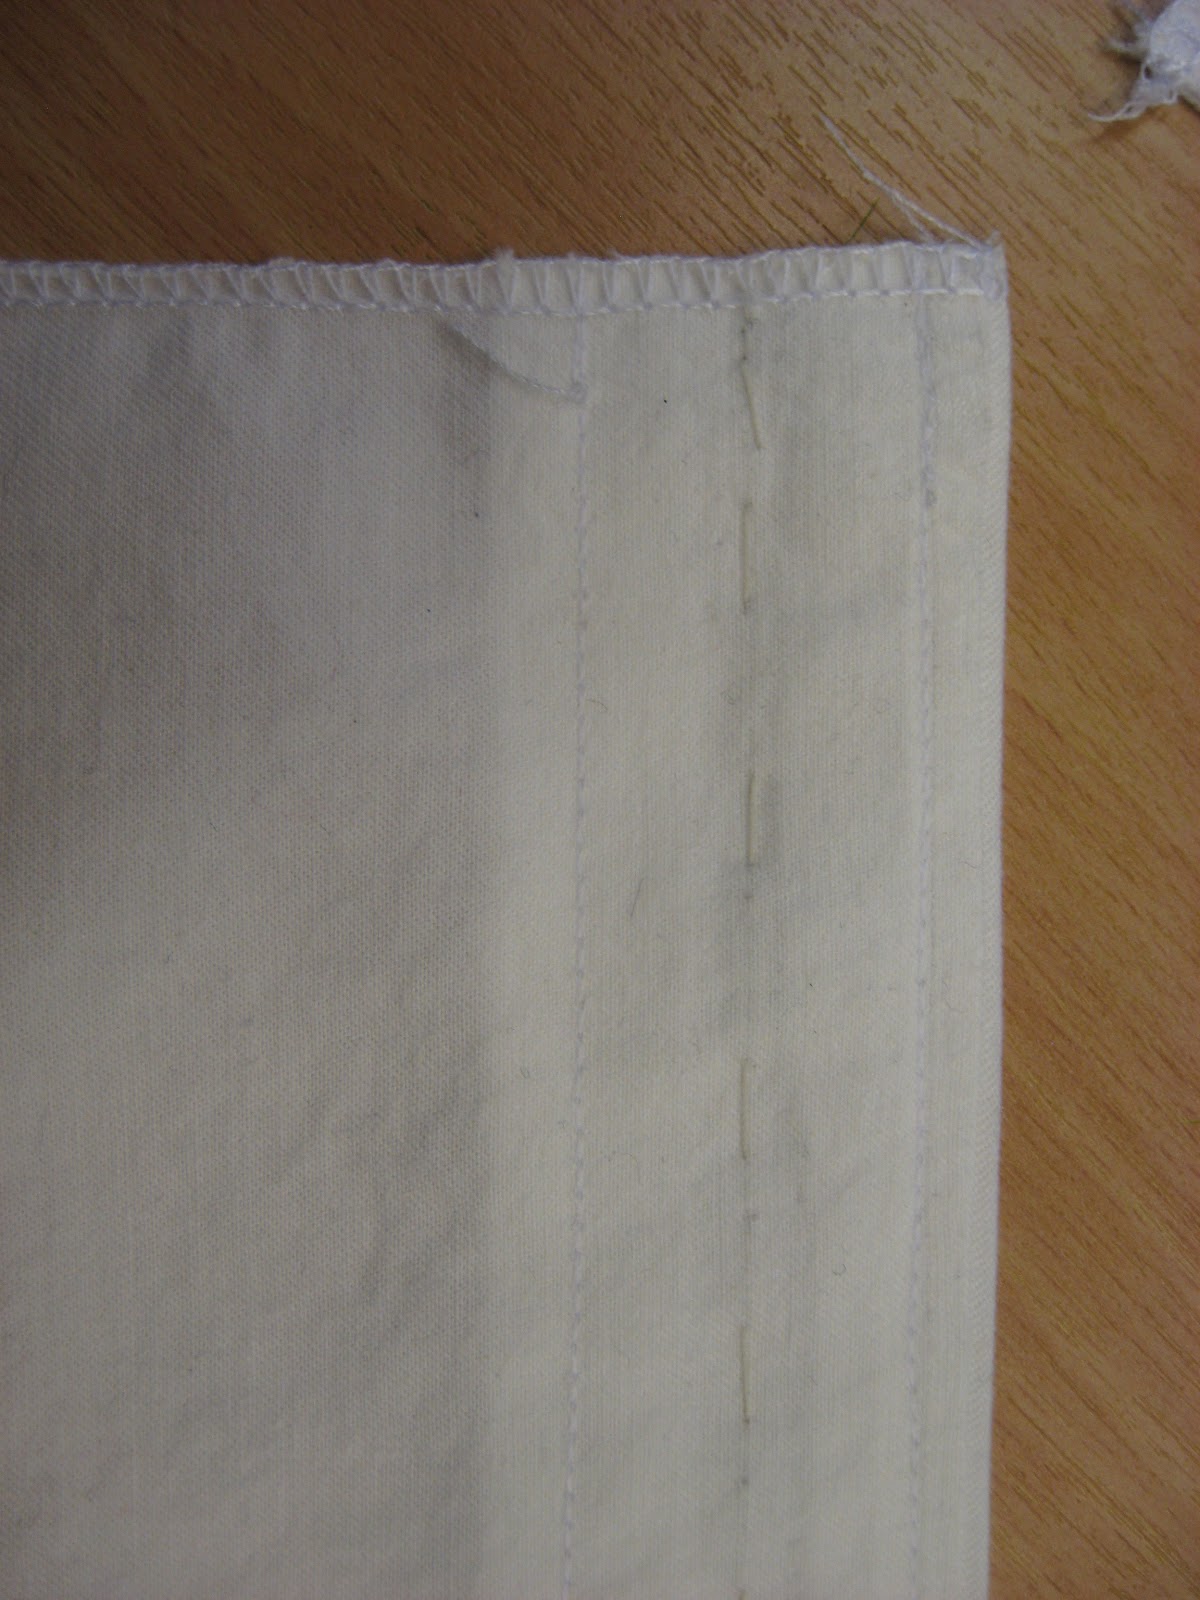


Our final result
Evaluation: I feel like this was a step in the right direction for my breaking down and a great first experience in breaking down to have. It was really helpful having someone actually moving around in the trousers and seeing them on a body, how they react to different movement. It was also an easier way to transition the protective maker into breaking down her own costume. Imagining the soldier in the woods sitting, crawling, climbing gave me a real live sense of the context of his character. Even if most of this real mud fades away I'll still be able to see the general area it stuck too and the areas that got the most grubby. It is a beginning template for a realistic breaking down.

Sunday, November 27, 2011

Breaking Down Research

Here is some of the research I gathered before starting the breaking down process:


Still from ‘My Boy Jack’. (n.d.). [Online Image]. Available from: http://images.movieplayer.it/2009/07/29/daniel-radcliffe-con-altri-soldati-in-una-scena-nel-film-my-boy-jack-125718.jpg. [Accessed 27 November 2011].

I felt like this was a strong image because it is in colour and is from a film set in WW1. The breaking down, especially on the trousers, is really intense. It is obviously raining and muddy and extreme. I won't be taking my trousers this far because the character hasn't really been in the trenches. He is more of a deserter and a wanderer. 

National Library of Scotland. Soldier’s Comrades Watching  Him As He Sleeps. (n.d.). [Online Image]. Available from:

I also find this image useful in gathering breaking down information and kind of a general feeling for the character of Soldier. His relaxed position and the feeling he is young and not so aware is good for the character of Soldier. Even though this picture is in black and white it still gives a lot of useful information on where things were broken down ans what got the most muddy and the dirtiest.
Covey, L., Ingham, R. (1992) The Costume Technician’s Handbook. New Hampshire: Heinemann  Education Books Inc. 
These two images/scans are from a costume book and have some useful text about breaking down. Although I  might not use every technique mentioned it is a good starting point to get me thinking about how to start.

Saturday, November 26, 2011

Finishing the Trousers

Leather Trousers from Costume Store
Once I had bagged out my lining to the waist of my trousers I to attach the lining to around the button stand. This was something that needed to look neat and not get in the way of the buttons. My tutor found this pair of leather trousers that were lined the knee for me to look at. Although they used a zipper fly, finishing off the lining has the same principle so it was a helpful garment to look at. I also looked at how they attached the lining to the trousers around the knee. They did a tack at the seams; however I will be doing a swing-catch so there is still movement but they don't bunch up when he moves.
Leather Trousers from Costume Store

I started to finish off the button stand/lining by using a herringbone stitch to hold down the seam allowance on both stands. I stopped before I got to the curves. I might not have had to do this but I think it will hold down that extra bit of seam allowance and I was careful to not let the stitching show on the outside. Then I careful folded over the lining to just cover the stitching on the button stand. Then slip stitched the whole way around. 
Finished stand and lining close-up

Full View finished stand and lining

Full view of trousers inside out 

Evaluation: I wasn't completely on board for lining the trousers when my tutor told me I had to. But I really think it finishes off the trousers to a higher standard, as well as, being more comfortable for the wearer. It also gave me some advantages like just being able to bag out around he waist line so everything lays nice and neat. Getting the lining to sit flat around the button stand was a little tricky and took some time to get flat. I don't think this would have been as successful if it wasn't on a stand. Having it on the form helped me keep it smooth without pulling it while at the same time making sure it was tight enough and not too baggy. I think this makes the inside of the trousers look very neat and clean and I am happy with the final result.


Friday, November 25, 2011

Trouser Hem


Because my trousers are tightly wrapped with the putties they do not need to be rolled hem. This is a positive because it will decrease on the bulkiness around the ankle. If I was unsure if these were going to be wrapped with puttees then I would probably do a rolled hem since that is how they were done at History in the Making. I was able to just do a zig-zag stitch to finish off the bottom hem. Here are the samples I made to try out different stitch lengths and widths on the trouser fabrics.

Zig-Zag Hem Samples
These two sections are with a fairly narrow stitch width, 2 and 1.5 make the zig-zags very close together. The stitch length can pretty much stay the same since the widest is the best.

Zig-Zag Hem Samples
 These two sample stitches are with a very narrow stitch width (1.5) and a very wide stitch width (4).
Final Hem on Trousers
Reflection: For the final hem a wider stitch width was used as well as a long stitch length. This was the best option because the more narrow close together stitches made the fabric ripple a little. For this fabric I think a zig-zag stitch is the perfect compromise between a rolled hem and no hem at all.

Thursday, November 24, 2011

Finished Shirt Button Stand

Shirt Button Stand before Second Fitting


Shirt Button Stand after Alterations

Evaluation: The result of re-doing the button stand was extremely rewarding. I really thing the shirt has improved by leaps and bounds. It looks more like Rose's design but still fits the period. I also think it looks neater and maybe more put together. I also think as a piece in the costume store, having a full button stand, might give it a bit more range to be in many different productions. I was really pleased with how the shirt was made before the second fitting, I think technically it was put together well. However after changing the button stand I can see that it fits more as a design feature and not just a shirt. 

Wednesday, November 23, 2011

Belt Loops

Belt Loop Sample

Belt loops for my trousers was another feature I felt I needed to do a sample of first. I was able to use the actual belt that my actor will be wear which helped to get a feel for how it will look. I mainly wanted to do a sample to see which would be the strongest and best looking way to create them. With the thickness of the fabric I knew I wouldn't and really didn't need to finish off the edges in anyway because the fabric wouldn't fray. I had already planned on doing some top stitching on either side of the belt loops just to add a little detail. What I really wanted to experiment with was using either single thickness or double thickness. In the picture above the belt loop towards the left is the single thickness and the belt loop to the right is the double. This also gave me the opportunity to practice putting the belt loops on. After I finished the sample both my tutor and I agreed that the double thickness was the right thing. It was stronger and more sturdy, and I think the thickness adds to the over-all bulk industrial feel of the trouser. There was never a need for the trousers to be delicate and so the belt loops should not be either.

Finished Belt Loops.
Evaluation: I am very pleased with the finished belt loops. I think it was very valuable to do a sample first just to double check that what I was thinking would be right. The double thickness will be a very lasting feature on these trousers and won't easily wear out. I had originally thought I would create sort of like a hanging loop to hold the belt. This option is so much better because it will be stronger and last longer. As well as being a design feature that will enhance the utilitarian feeling of these trousers.

Shirt Button Front Samples

Button Stand Sample

Button Stand Sample Button and Button Hole Sides

Now that it was decided to make a full button stand it was time to decide how to do it. There was a shirt found in the Costume Store that was being worn by the Narrator so I used that as a reference. By looking at the button stand they had done it completely different from how would have done it. I decided to make to button-hole sides in samples to see which method was easier, faster, and looked the best.
Button Hole Side A
Button Hole Side A: This sample is done to how I thought it should be done. I cut my button stand fabric and tacked down the middle and added 1/2 inch the whole way around. The I put right sides together and machined straight down on the center front line (with seam allowance). The I pressed it and opened it flat to so I could see the seam. Then folded over the free side of the button stand about 1/2 inch. Then folded over the whole button-stand so that it sat on the top side and making sure the seam was rolled to sit on the underside. Then tacked down the folded edge of the button stand and machined a line straight down and close to edge and did the same on the center front edge.

Button Hole Side B

Button Hole Side B: This one is done how they did it on the other shirt. First the center front of the shirt is folded over 1/2inch so that the raw edge sits on the right side of the fabric. Then the button stand is created by simply pressing over 1/2inch on both sides. Then tacking or very carefully pinning the stand on the right side of the shirt. Then machine straight down, close to the edge on both sides of the button stand. Being careful on the center front to catch the folded shirt edge in the stitching line while keeping it straight. 

Evaluation: Both of these sides are sturdy and look neat and clean. I do prefer side B because I feel like it stands out more and looks more authentic. To be honest unless you were really inspecting them there isn't much difference in the finished result, and it certainly wouldn't be noticeable to an audience in a theatre. I do think this was a useful sample to try because it means I came up with my own way of doing something and tested it. I also now have another great sample for my portfolio.


Fixing the shirt

After my first fitting it was clear that there would need to be some major changes to the shirt. Resetting the sleeve was not too difficult, however the biggest challenge was taking it in the front. Because of the button stand something drastic was going to have to happen. After talking to my tutor there were a few options. We could have left the button stand in and created a pleat that fanned out at the bottom of the button stand, we could take the button stand off and move it over which would also create a pleat at the bottom of the button stand, or we could try and creatively use the fabric left to make a new front. In some ways doing something like that seemed to have a greater opportunity for disaster and the potential to take a lot of time. At this point I didn't want to spend a lot of time trying to fix something that could be more quickly completely re-done. I was getting nervous about time because I knew I would need a couple days to break things down. After talking to my tutor we decided our best bet would be to do a full length button stand. It was such a simple solution but it made sense. I went to do some research to see if it would fit with the period, but I did already know that it would fit in with Rose's design, which was an added bonus.
Research: 
Oliver, J. (e.d.). (1995). Everyday Fashions 1909-1920 As Pictured in Sears Catalog. New York: Dover Publications


Cariou, G. Shep, R.L. (1999). Shirts and Men’s Haberdashery: 1840-1920’s. California: R.L.Shep Productions.

Cariou, G. Shep, R.L. (1999). Shirts and Men’s Haberdashery: 1840-1920’s. California: R.L.Shep Productions.
All of these images just reinforced the idea to put in a full length button stand.

Reflection: I feel that putting in a full length button stand is the best of all possible solutions. It is completing  Rose's design more exactly. And to look at it critically, it probably won't make too much of a difference in it's appearance. The button stand on it now is so long, and the Actor's trousers sit above his waist that there isn't much room between where the button stand ends now and where the tops of his trousers begin. The shirt might even sit better or more flat with the stand tucked in. It will hopefully make things a little quicker for me rather than having to work out how to take out fabric without ruining the button stand; and there is plenty of fabric to make a full length stand. With historical research to back me up, I feel like this is the best possible solution.

Monday, November 21, 2011

Filming in the Studio

This morning the film crew that is making a small documentary about the show came in to film us working on our projects. I found this to be a kind of intense experience. For some reason I was nervous about it, even though I was assured by Rose they wouldn't be asking questions. They mentioned that they really just wanted some shots they could blend into a montage. It was a bit of tight squeeze between all the costume students working and the film crew with their equipment. I also wasn't sure what to work. Since it was right after our second fitting I was just adjusting and marking the alterations which didn't seem all that interesting but I did use the machines and the irons and they were able to film all of that. I think it all went well. I don't think this is a usual happening on a live show but I think if I was working on a film they might want to film people working on every part of the show. I also hope it looked like we were all working very hard. I think sometimes the amount of time that goes into the costumes is under-appreciated but I liked that some of what we do has now been caught on film. I'm excited to see the result before the show starts.

Friday, November 18, 2011

Waistcoat Second Fitting

Actor John wearing Waistcoat

Actor John wearing Waistcoat
I also had a fitting for my waistcoat today, along with helping on a fitting for the rest of the suit. This was a very positive fitting with not many changes. The waistcoat backs fit well, as they did in the first fitting, my only thing to change is just to make the straps in the back longer so they easily reach through the buckle. The  fronts of my waistcoat also fit well; and I was happy to see that all the stripes matched up in the center front.

Evaluation: This was a very positive fitting. I think that main challenge for me in making this waistcoat is matching up the check and making sure everything sits very neatly. I was very happy with the fit of the waistcoat over-all. There isn't a lot of extra room in the back so the straps won't need to necessarily be put to much work. This is why the back straps need to be a bit longer, so that it isn't straining to go through the buckle and pulling the front too tight. John seemed to be very comfortable in it which is always encouraging. Although I don't have many alterations to the waistcoat I know that the finishing will be a very key part to making this waistcoat to a professional standard. There is still plenty of work to be done but I am greatly encouraged by this successful fitting.

Soldier Second Fitting

Actor Josh in Soldier's Costume
Actor Josh in Soldier's Costume 

This was my second fitting with my actor Josh and my first fitting in top fabric. Over-all I am pleased with how the fitting went. I did have a few things that would good and a few that were not. When Josh first got into the costume I made sure to ask him how everything felt. I was concerned that since the trousers come up so high on his waist that if the shirt was too long it would be uncomfortable. But he assured me that is was fine at the length it was. Aside from an over-all general feeling I also wanted to know how the lining worked in the trousers. When I asked Josh about this he said it was fine and didn't feel bunchy on the inside or anything like that which was a good thing to hear.
Trousers: I think the trousers were my biggest success in the fitting. The fabric looked really great and very authentic and the fit where it was taken in worked really well. I didn't have the braces buttons on so they were just pinned but this is helpful in giving me the correct placement for them. The height of the waist line fit well after it's alteration and the fly front looked neat. There weren't any big changes for the trousers except for adding belt-loops and finishing everything off neatly and precisely. I was cautioned that they would need a lot of breaking down and that might take time.
Puttees: I didn't have the puttee's fabric cut so we just used calico for the fitting. I cut in 3.5inch strips that were wrapped around to see how they would fit and hang. This also gave me a point on the trousers where about they should stop and I marked that with a safety pin to tack in later. Rose and the director liked the width of the calico puttees so I can go ahead and cut them that same width out of the top fabric.
Shirt with taken in Center Front. 
Shirt: The shirt was my least successful part of the fitting. Unfortunately it was some of the same issues that came up in the first fitting, that hadn't been completely resolved. The collar again was to large and really needed to be scaled down to almost half the size it was. The button stand was also a little too wide but in general the shirt was a little too baggy. This posed a big problem for me because of the button stand taking it in wasn't an easy fix. I was worried when we pinned in how much it should go in because I'm not sure how to fix it. This will be a challenge that might need some extra creativity. The other issue with the shirt were the sleeves. The director and our tutors didn't like the gathered sleeve, they felt that it was too pouffy and made him look too feminine. Despite my historical research they suggested that I take the gathering out and make it a fitted sleeve. This really shouldn't be too difficult because I can just fit it into the arm hole by opening up that side seam just a little. The cuffs, however, fit where I took them in for the last fitting which was good. I wasn't sure if they would be rolled up for most of the show, as they were in Rose's design, or if they were going to be rolled down at any point, in which case they would need a cuff button. He is now wearing a jacket for a little in the beginning so I will be adding a button and button hole to cuff of the shirt which is an easy alteration.

Evaluation: I feel that this second fitting was a success and I am happy with the Soldier's costume so far. The trousers I am particularly happy with and feel very rewarded with how I was able to use my research and create samples to successfully create them. I think there was a certain amount of risk in going from the calico toile trousers to the heavy wool because they are such different weights, but it was a very positive transition. I feel confident, at this point, in finishing my trousers within my time plan and finishing them well. I'm glad the calico puttees worked for this fitting but I felt during the fitting that maybe I should have more to show for them. I could have done some dying or breaking down samples for the fitting to show the designer and director. In the future I will be more careful to think of  everything before the fitting and to always bring samples. The shirt was a big disappointment for me. I really felt strong in my pattern choice and I was pleased with the techniques I had used. In the end it comes down to the design and if the changes fit the design better they will be worth the work. This second fitting was a big improvement to my first fitting and a positive step to completing my costume.

Wednesday, November 16, 2011

Trouser Pockets

Once the button fly was complete I was ready to put in the pockets. I've never put in a side entry pocket before so it was a new process. I have put in pockets into dresses and skirts when I've made them in the past but that hasn't been for a costume class so I wanted to make sure I did it correctly. Luckily I had a few references to look at. My friend Mary supplied me with the instructions below which she received from a tutor on the last unit while she was making a suit. This was really helpful for seeing how the pattern pieces should look drawn out. And I was able to look at the measurements from there and then put in my own measurements. I also had the first hand knowledge I gained at History in the Making. I took and recorded the measurements from their pockets and that is where I took my measurements for length and for width, as well as the size of the pocket opening. 

Diagram from Mary

From my trip to History in the Making


Once I had completed calculating my own measurements it was time to cut out the pockets. I was able to use the white fabric of the shirt  which worked well and matched what they used in History in the Making. Getting to look at the pockets in a finished costume was so helpful that I was able to put the pocket together with relative ease. It took me a little while to get the french seams perfect but I managed in the end and was happy with the result. It was also very easy to put small pieces of facing in that were a little longer than the actual pocket opening is.  


Put together pocket

Put together pocket showing lining
Once I had put the pockets together it was time to sew them in. I did find this part challenging. The fabric of the trousers is very thick and sometimes hard to move around or get into the right place. But I was able to draw on the previous experience in dress making to complete the pocket and sew up the side seams as well. When I finished I tacked the pockets at the waist so they sit towards the front and gave everything a good press.

Finished Pocket
Evaluation: I am very pleased with how the pockets turned out. I feel like I really drew on the knowledge I had from previous lessons and personal experience. I am also happy I was able to take so much information from my History In The Making visit that I could construct the pocket mostly with that information. The only real problem with the pocket was that on the one side the pocket extended over the button fly and really it should sit under the over-locking. I talked to my tutor about that and we were able to just turn the fabric in a little and machine it together so it was smaller. I am very pleased with the side concealed pocket.

Thursday, November 10, 2011

Button Fly Front Sample

Creating the WW1 Army trousers is something I have never done before. In some ways you could compare them to the 18th century breeches I made last year, in the way they are drafted and how they are put together for the first fitting. One of the obvious differences, aside from the length, is the front closer. In 18th century breeches there is a flap and a sort of button stand hidden on the inside. On WW1 army trousers there is a concealed button fly.
Example of concealed button fly from History In The Making, this is what I will be trying to create on my button fly.
Here is a pair of trousers from around the same time as army trousers; found in the costume store. This has a similar fly but not exactly because my trousers are without  a waistband how the button stand is finished is a little different but otherwise very similar and helpful to look at as a comparison. 
Because I have never created a concealed button fly before I decided to create a sample so I could figure out how it is made and practice this new process before cutting it out of my top fabric. I was lucky that there was a packet about button flys in the costume department that I could sign out and use. In the packet was a small already made example in denim with other denim examples of the fly in progress and I was able to copy the instructions from the packet as well. I was also given some sample fabric in a wool similar to my actual trouser weight to use for the sample. All of these elements coming together was very helpful in me learning this new process and I was able to create the concealed button-fly sample below successfully. 

Sample Fly-Front Closed 

Sample Fly-Front Buttoned

Sample Fly Front Half Un-Buttoned

Sample Fly Front Completely Un-Buttoned.
Evaluation: Using the helpful instructions from our costume course creating this button fly was fairly simple. I did manage to get confused with the different pieces like the button-fly, placket and facing and how many there were to be of each and how many pieces of lining and which side to sew up. I did manage to accidentally create two button flys, instead of one button fly and one placket. I think this was because I didn't properly mark the wrong side of my fabric, so that will be something I will need to be careful of when creating my actual button fly. Along with being a great sample for my portfolio this was also helpful in practicing button-holes and finding appropriate size buttons. For the sample I used buttons I already had in my button box, but I remember buying them from our costume course haberdashery; I think I will suggest to Rose and Grace to look there for potential buttons for the trousers. I was very happy with the finished button-fly sample. In talking to my tutor she did suggest moving up the top-stitching line (which is why there are two pins towards the bottom of the fly). I think this will really finish the fly front better than how I've finished the sample. It wasn't easy to get a straight line so close to the curve of the fly top-stitching and by moving that sewing line up I think it will look neater and more deliberate. Creating this concealed button-fly sample was a successful new process, a great piece for my portfolio, and a helpful practice for my actual garment.

Friday, November 4, 2011

Waistcoat Pockets

Finished Waistcoat Pocket

Finished Waistcoat Pocket

Here are my finished waistcoat pockets, on the actual waistcoat fronts. I think they are very successful and I am proud of how the lines match up. I found creating these pockets very tedious and stressful due to the strong pattern; it took s few tries on each side for me to get it right, but I think the final product was worth the extra time.

Evaluation: I am very happy with how these pockets turned out. They were very challenging to line up because of the several different coloured stripes. I also have never worked with such a lightweight wool and had to adjust how I approached the pockets because the fabric didn't always stay where pinned. I think this is probably one of the most challenging tailoring fabrics I could have worked with and probably will ever work with; so I feel like my efforts were not wasted because I was really challenging myself. I have learned that tacking is very very important, to measure twice cut once, and to double check everything before I cut into anything.

Thursday, November 3, 2011

Waistcoat Pocket Samples

Welted Pocket Sample

Welted Pocket Sample close
Due to the fabric chosen for the waistcoat I am anxious to begin my waistcoat. The strong checked pattern I know will be challenging to match up and keep looking clean, that is why I decided to try a sample welted pocket before beginning the two on the actual waistcoat. I cut out my fabric base using my actual waistcoat pattern (from the hem to a few inches above the waist-line) so it would as similar as it could be to the actual waistcoat. I used my hand-outs and notes from the Defining Practice unit last year when we made tailored waistcoats. It was very difficult to match up the lines and stripes but I am happy with the final result. Since this was also a sample I took the opportunity to try a different way to finish off the ends of the waistcoat. It is a bit easier to see in the second image. On the right is how we were taught in DP, although I would now fold over the ends and then top-stitch down. On the left instead I folded in the ends of the welt and slip-stitched it to the waistcoat. I will need to talk with a tutor with the sample to see which they feel would be more successful, however I think the way on the left is a bit neater and looks more finished.

Evaluation: Creating a sample before beginning the actual pockets was worth the time. Since I haven't worked with the fabric before I was able to learn more of how it worked and moved. I also realized that the pocket mouth I had tacked in and drawn on my pattern was proportionally small. I also think the welt is a bit too wide, and when I showed my sample to Rose she agreed that it might be a bit wide. I conferred with her and my historical research and we decided on a smaller width. I was able to talk to my tutor about finishing the ends of the pockets and she agreed the slip-stitching was neater but had concerns that it wouldn't be strong enough. But after discussing it we decided that with a machine top-stitch over top and close the end would secure it enough. This pocket sample was a chance for me to remember the how to make a welted pocket the tailored way, to work with the fabric, and solidify the length and width of the welt.